fbpx

Ansel Adams “In Our Time” a user experience at the MFA

adams-1
Entrance to the Adams exhibit

The B&W images that Adams created back many years ago have always generated an emotional response in me. In my college years I started reading about him and looking at his images. His books were then not far behind. I started reading his Camera series with much of it over my head. But, it was Adams after all and there was no better photographer in my mind. His work really started me on my career path.

All that being said, I have probably seen most of Adams’ images either in books, calendars, or exhibit. So the idea of a new exhibit was exciting to me. What more could they do? The last exhibit I attended was the Adams exhibit at the Peabody Essex Museum in Salem. There were only a few of his most famous images plus some very large murals. It was underwhelming. I was disappointed. So this new one was exciting plus it was the MFA in Boston.

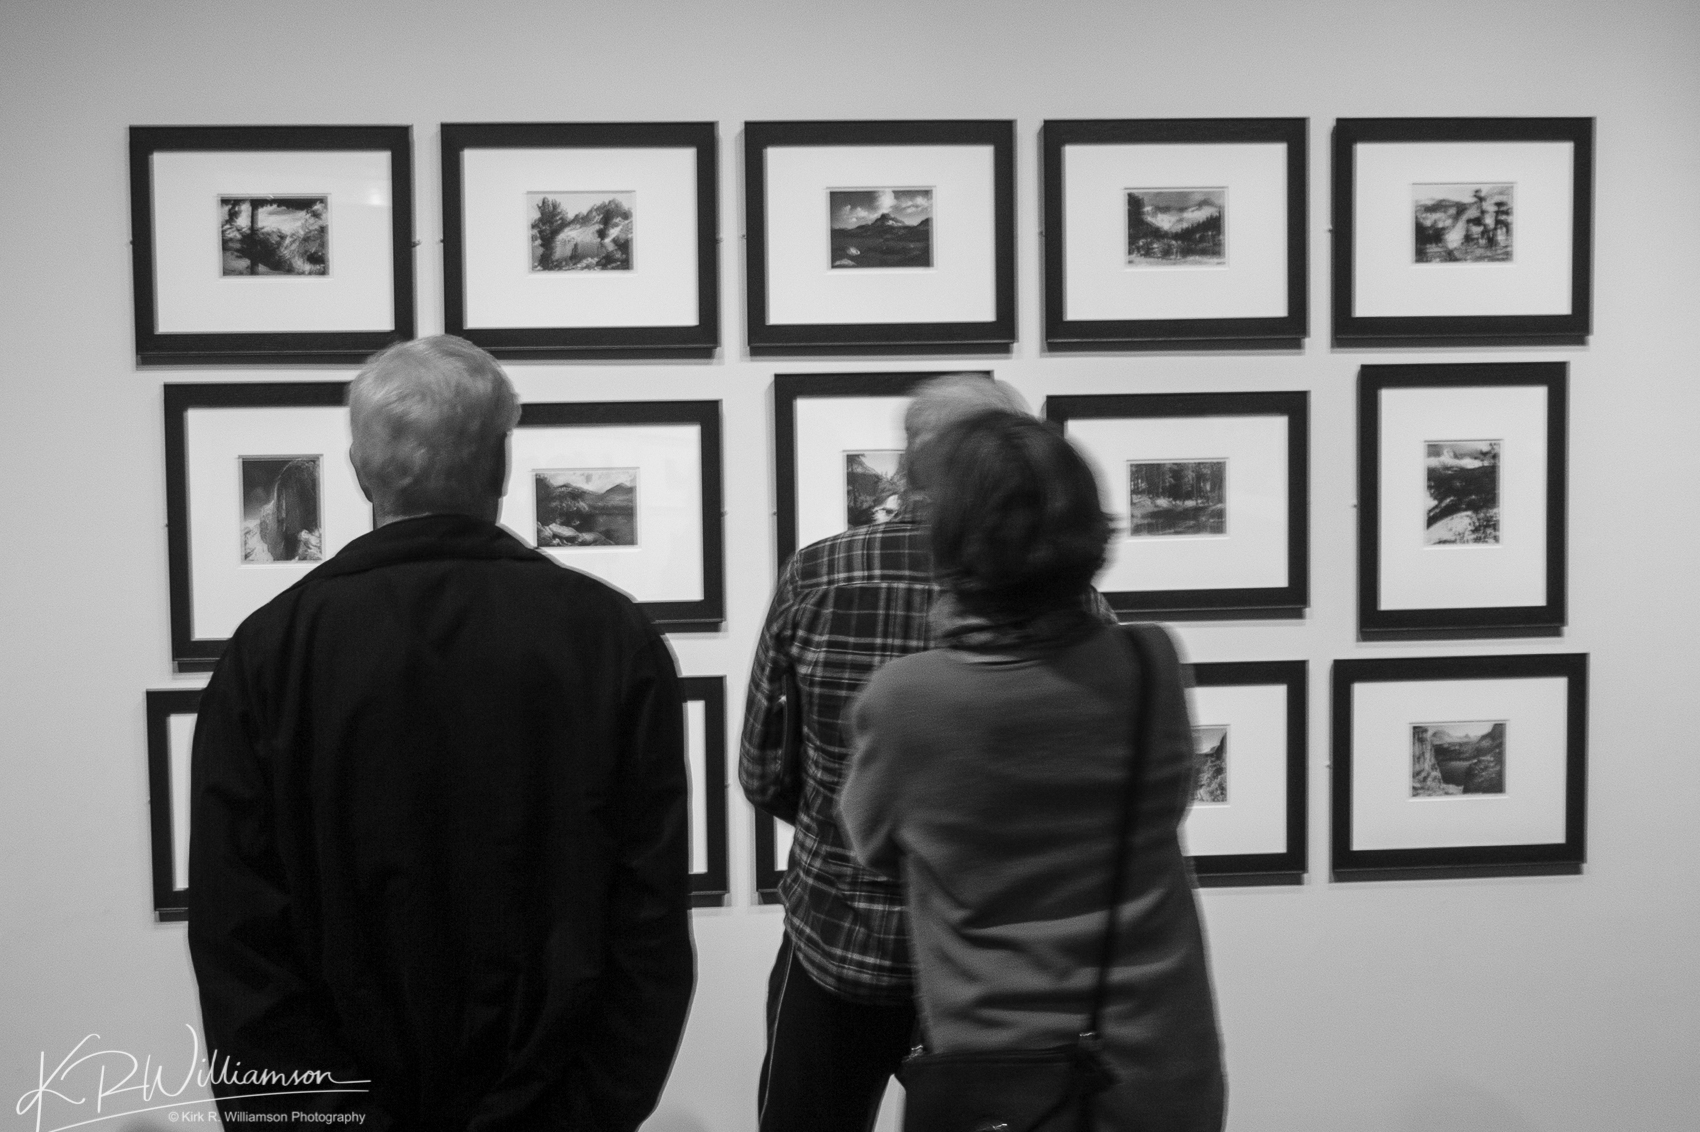
I wish I had a photo of it but as we went down stairs to the exhibit the emotions started to come back remembering my close connection to many of his images. The first thing to greet you before you go in is a giant mural of Adams atop his woody in the 40’s planning a shot with his 8×10 view camera. I have seen it before but not this large. My emotional connection came flooding back. There was the tall skinny Adams in his younger years at the height of his image making – wow!

Then my wife and I went into the exhibit and started to see that not only were Adams’ images present but also the works of other photographers (like Muybrige and Watkins) that influenced him. Then also contemporary photographers rounded out the exhibit.

A collection of small Adams prints on display.

The MFA has in it’s collection some 450 prints by Adams which is part of the Lane Collection and these are the images used for this exhibit. They are mixed with works by other photographers both contemporary and before and during Adam’s time. Thus the title Ansel Adams, In Our Time.

Overall the experience is pretty good but the prints from the Lane Collection are not as I expected. Many are old and small and the larger ones seem to be either printed too deep or under lit in the exhibition. Thus a disappointment to me. One of my favorites is Mt. Williamson (a great name) from Manzanar, CA. The print was in pretty good shape and a pleasure to look at.

Mt. Williamson

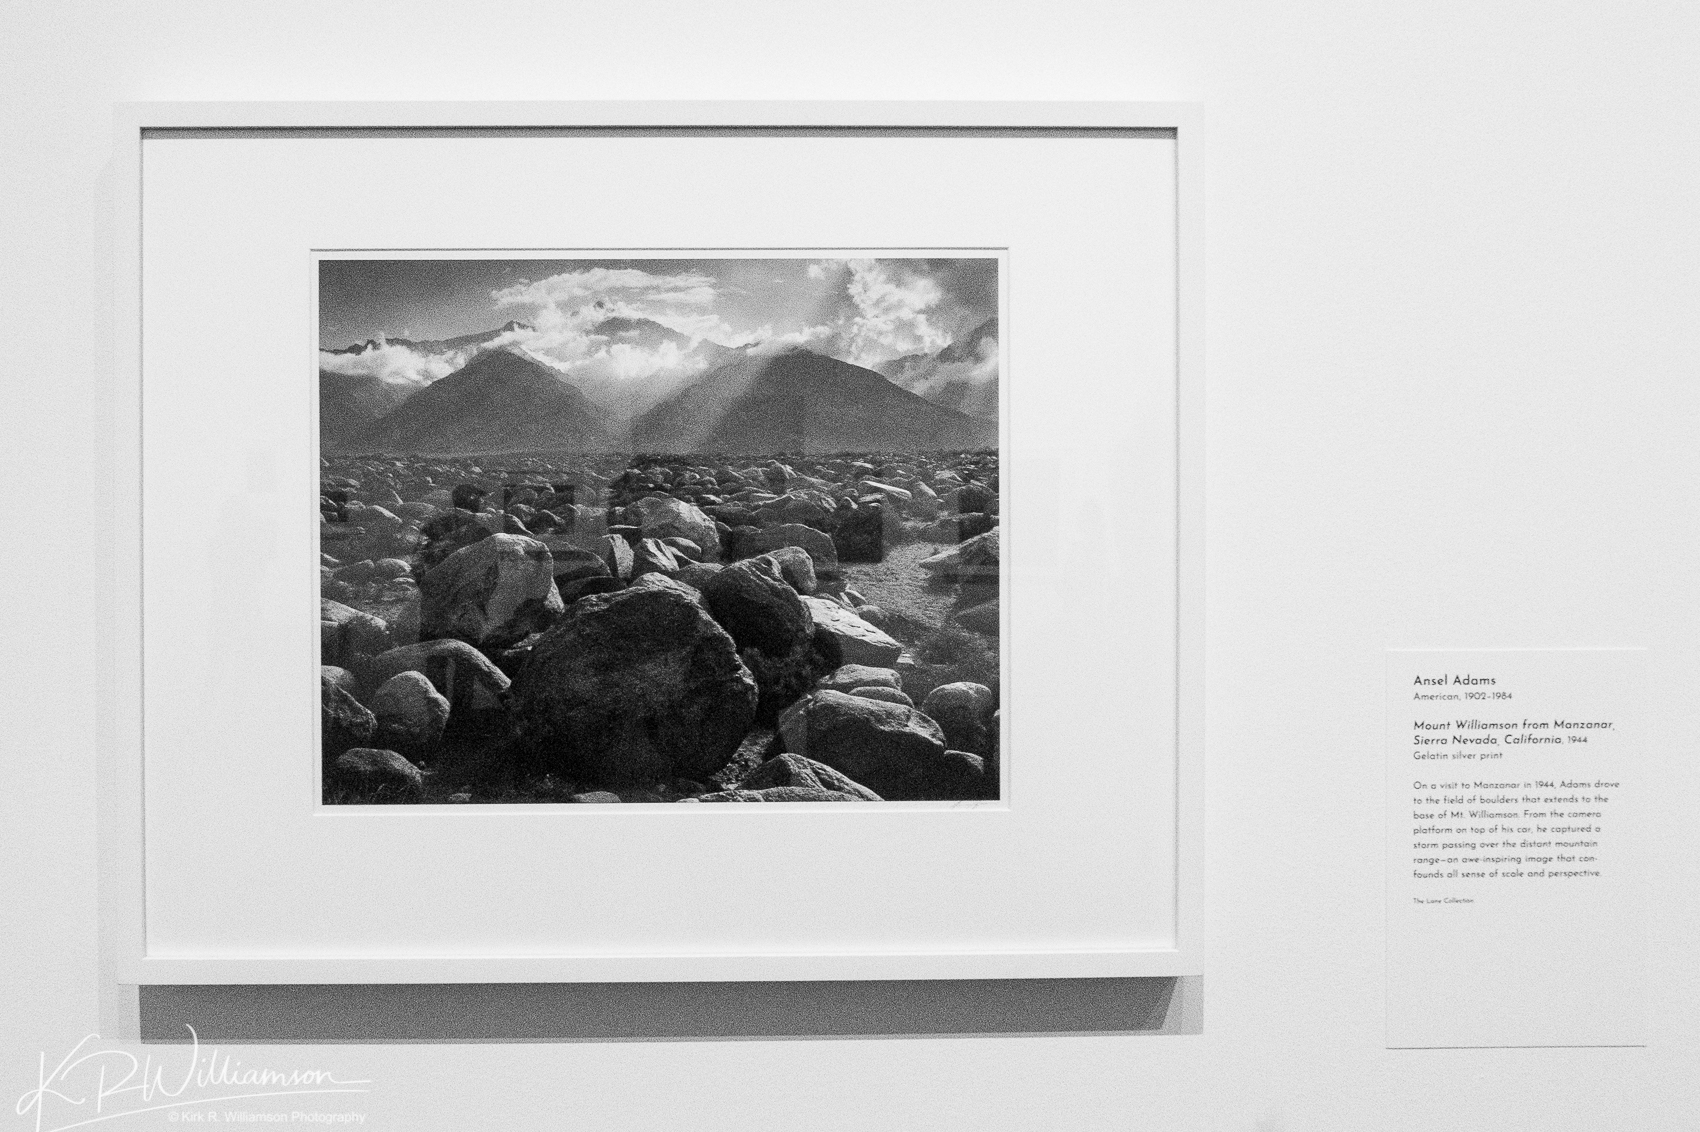
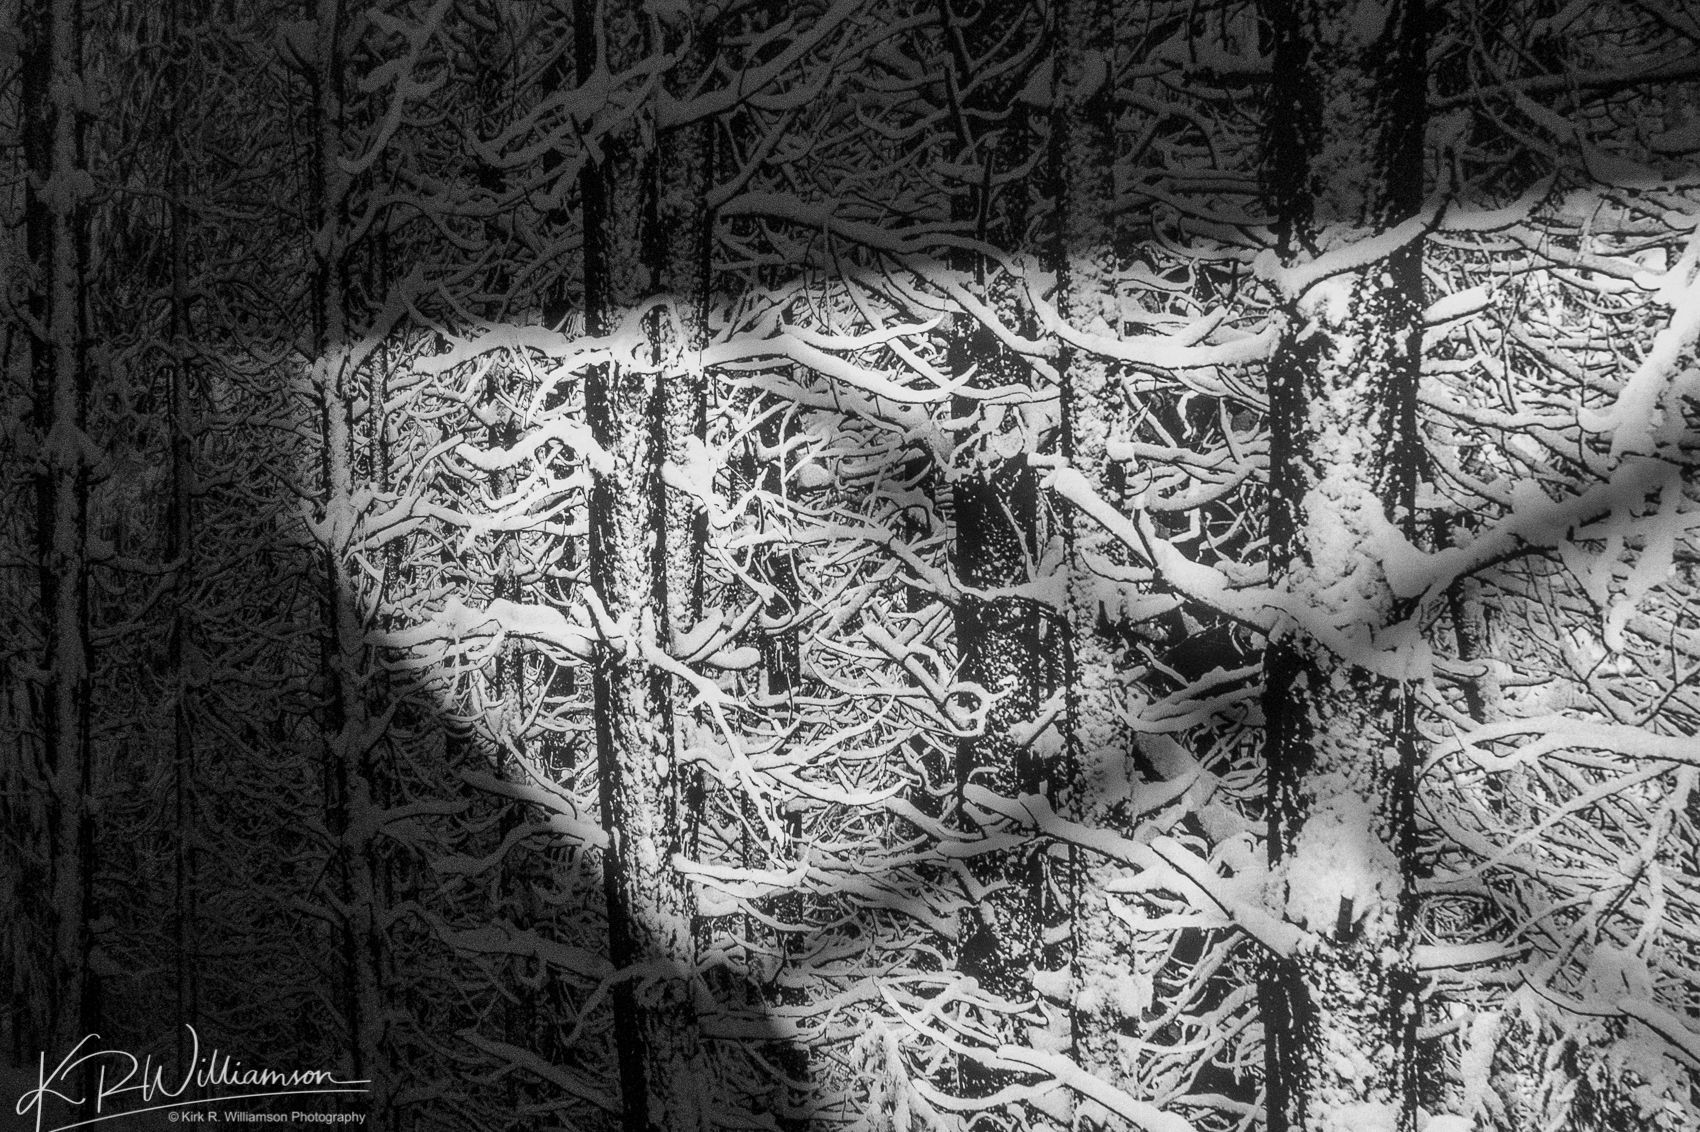
I wish this image was larger than 11×14 but what can you do. I have seen some of the contemporary work and the pano’s with old images inserted were pretty cool. The large burned forest images were also nice. They went along with Adam’s image of the same.

The work I was most distraught over was that of Catherine Opie. They were two large extremely out of focus images which were done that way on purpose. Thus to show how recognizable certain areas of Yosemite were because of the images Adam’s had made. In my opinion a complete waste of wall space. They even had a video interview with the “artist” sorry, another waste of time. I walked on. Some other large works were double exposures or layered images of recognizable scenes for Yosemite (I think) might have been the Snake River in Wyoming.

Overall the experience was pretty good but not what I expected.

As you walk out you are forced into the gift shop – to be expected I guess. Then you get to see one of my all time favorite images made by Adams is a 20 ft. high mural. Wow it was so cool. I made my own interpretation of it.

Pines in snow

I absolutely love this photograph of his. It was insane to see it the size of an enormous wall. Then we were off to the cafeteria for an expensive lunch. The Adam’s imagery was all around us.

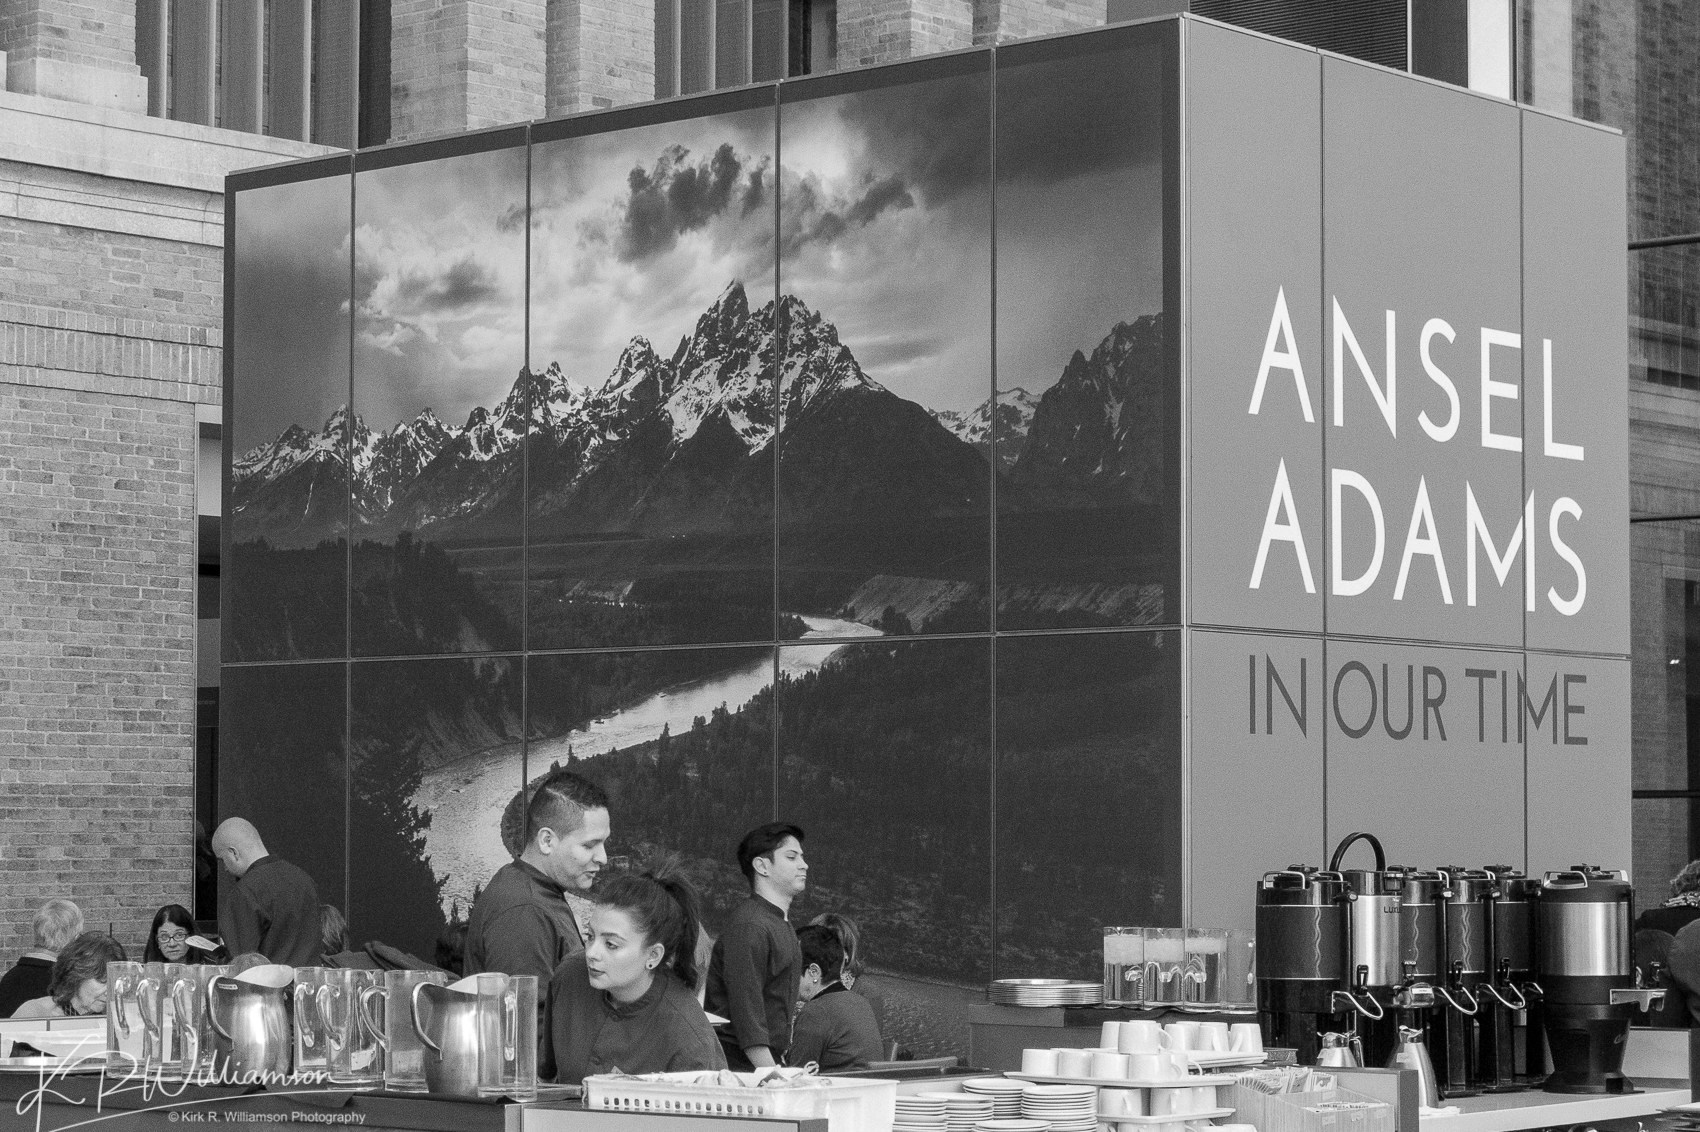
You could not escape it. This image here of the Snake River and the Grand Teton’s is one of my all time fav’s.

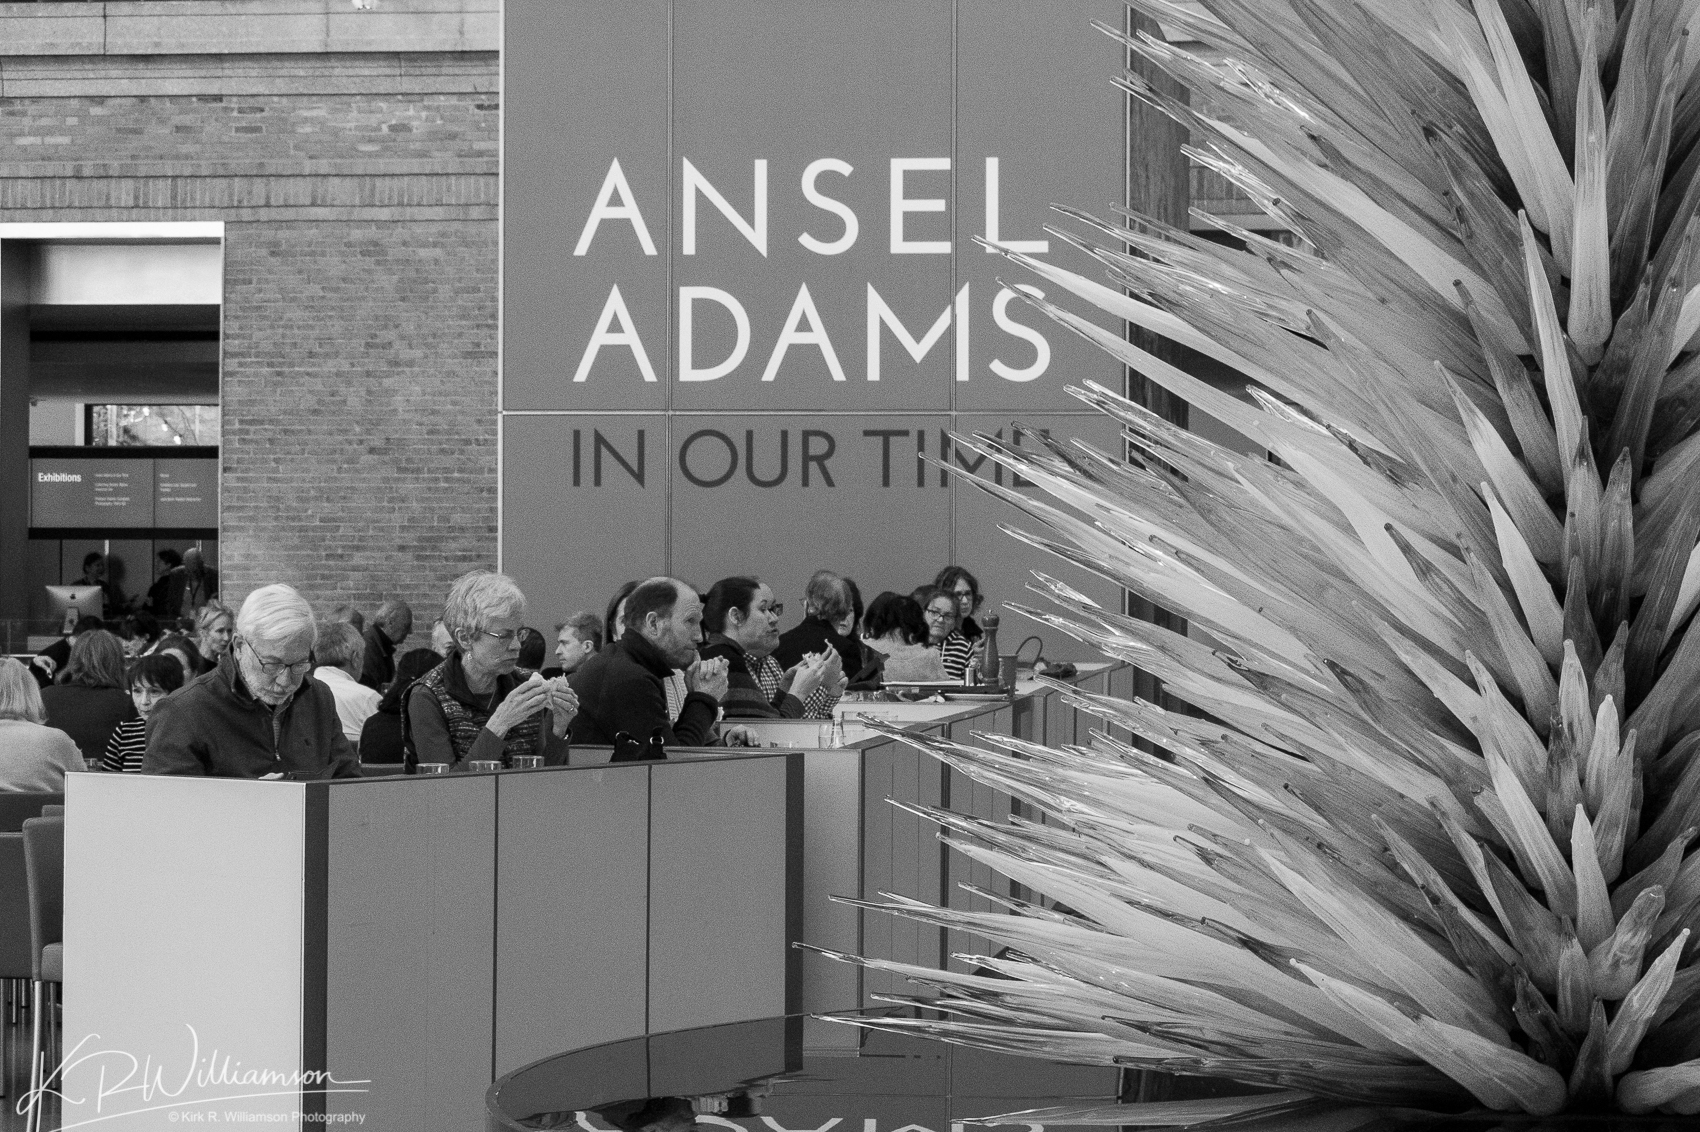
Folks enjoying an expensive lunch.

The exhibit goes until Feb. 24, 2019. So go on in and enjoy and make up your own mind as to what you think of it. As a huge Adam’s fan boy I was not overly impressed. The theme was an ok idea but poorly executed. Why they had to go find the weirdest contemporary imagery to go with it is beyond me. The influenced contemporary photographers should have been represented by work that clearly shows Adam’s influence not bizarre imagery. The work of Muybridge and Watkins that influenced Adam’s – great idea!

I think you get the picture – sorry for the pun, couldn’t resist.


Five Tips for Consistent Photographic Results


New Hampshire stream
Soft light can be beautiful for certain scenes.

Be hyper sensitive to light

This is one of the first things I teach my students. Learn to feel the light. How is it playing on subjects? According to Alfred Eisenstaedt “You sense the light with your eyes and respond with your emotions”. If you are always aware of light and how it reacts to the scene around you your decisions in photographing it are much better. So take the time and look at how light reacts to things around you. Just sitting reading a book, or in your car driving. Once you start really looking at the light you will begin to feel it.

Pre-visualize your subject

This next step is essential in getting consistent results with your photography. If you know what the final result will be you have a better chance of achieving it. I often give my students a 35mm slide mount painted flat black on one side white on the other. This method has been used for many years, mostly with a 4×5 frame card. I have used a larger 3:2 ratio cut out but it is far easier to carry around a small 35mm slide mount. So instead of using your camera use the slide mount to pre-visualize what you are going to shoot.

The critical part is knowing by instinct what you are going after and how you are going to get there. Very seldom do I make decisions while editing. I know before hand as I am shooting what I want. Part of my process is to decide before I shoot how I will crop, and post process the image. At this point it is instinctual. I know my camera and lenses so well that decisions on how the eventual image will look are done before I press the shutter. Now that being said, some tweaking in Lightroom may be required to gain that final vision.

People often ask me about my B&W work and do I shoot everything in color to start. Most of the time I will shoot in color so I don’t lose the option of having both. But I know beforehand what the final result will be. I like to shoot in B&W every once in awhile as it keeps me sharp and making my B&W pre-visualization sharp. With mirrorless cameras it is easier as you are looking at a B&W image in the view finder when set to monochrome.

Dinghy's & Motif
Early morning light gives everything an incredible look.

Your Process

Once you have a repeatable process of making photographs you will begin to have repeatable results. If you learn one thing from this post its that last quote! I tell my students to develop there own repeatable process to making photographs. Let me explain. Do the same thing every time in the same order. Once you have this process down everything else becomes much easier. Here is my process which for you folks might be different.

  1. Find your composition using slide mount or camera
  2. Set your tripod up and mount the camera
  3. Set your focus point
  4. If using filters mount them and figure exposure
  5. Check your composition and focus point
  6. Make your first image
  7. Check preview for exposure and focus
  8. More exposures with different shutter speeds using live view

When I free form shoot, just walking about, my process is different when not using a tripod. I will try to make things easy by shooting in aperture priority and setting the ISO myself keeping in mind what my lowest allowable shutter speed is.

Sunrise reflection
Leading lines – one of my favorite composition rules

Only use two or three composition rules

This may seem obvious to some but to others trying to use to many composition rules messes them up. I am hyper aware of only two. The Rule of Thirds and Leading Lines. My third go to is uneven numbers in a composition usually one or three. Simple and effective. There are tons of others which as far as I’m concerned are all just some form of my first two. So don’t get wrapped up in trying to find weird compositions just pick two or three and things will become a lot easier.

Practice

Just like anything else the more you do something the better you will become at it. I give my students things to practice on that will help them improve. My favorite is to have them tape their zoom lens on a certain focal length. My favorite is to make them shoot at 50mm only. This is a tough focal length since most people shoot with a 28mm as their main lens. Most zoom lenses are 28 – 70 or longer. Once you practice at one focal length you will start to see differently. Another thing I preach is to always have a camera with you. If you do you will always be ready for an image that just begs to be taken. Plus you will be making more images and therefore practicing more. So practice makes perfect is a great motto for photographers. Now that being said don’t practice the same thing all the time. Shoot different things to challenge yourself. Different focal lengths, different lighting, different subjects.

If you keep these five things in mind you are bound to become a more consistently good photographer. The hardest one of these five things is your process. Once you get this one thing down making great images consistently will become easier.


The Early Riser

When is the best time to make great images? I get this question repeatedly when showing people around my beautiful island. Well obviously not all locations are lit the best at the same time of day and at the same time of year. Over this past season it was clear that certain places were better lit at different times. All that being said I am a big fan of early morning light. At this time of year especially, because you don’t have to get up at an un-godly hour. If you are up and out by 6 AM you will see dawn, sunrise, and some beautiful light horizontal to the horizon with gorgeous long shadows. Sunset is nice, and at this time of year the sun is lower in the sky all day which gives you more opportunities to shoot. Either way you look at it golden hour is the best. An hour before and after sunrise and an hour before and after sunset will get you some great results. The images will be warmer (color balance) and the lighting will give your images some texture. The difference in color will be before the sun comes up and just after it goes down because the colors are bluer.

oldhouse-1
Early morning light in Ipswich. Warm light, long shadows, and texture. Not the best photo composition wise but it has the three elements I like to work with the most.

This image was made in Ipswich while out for a walk while having my car worked on. It has all three of my points for today’s post. Warm light, long shadows, and texture. In my next post I will be talking about composition. Here’s a tease. Most of my images have a central focus. The image above does not. It has some leading lines but but that’s it. So we will get into a discussion of a few things that I look for when composing an image.