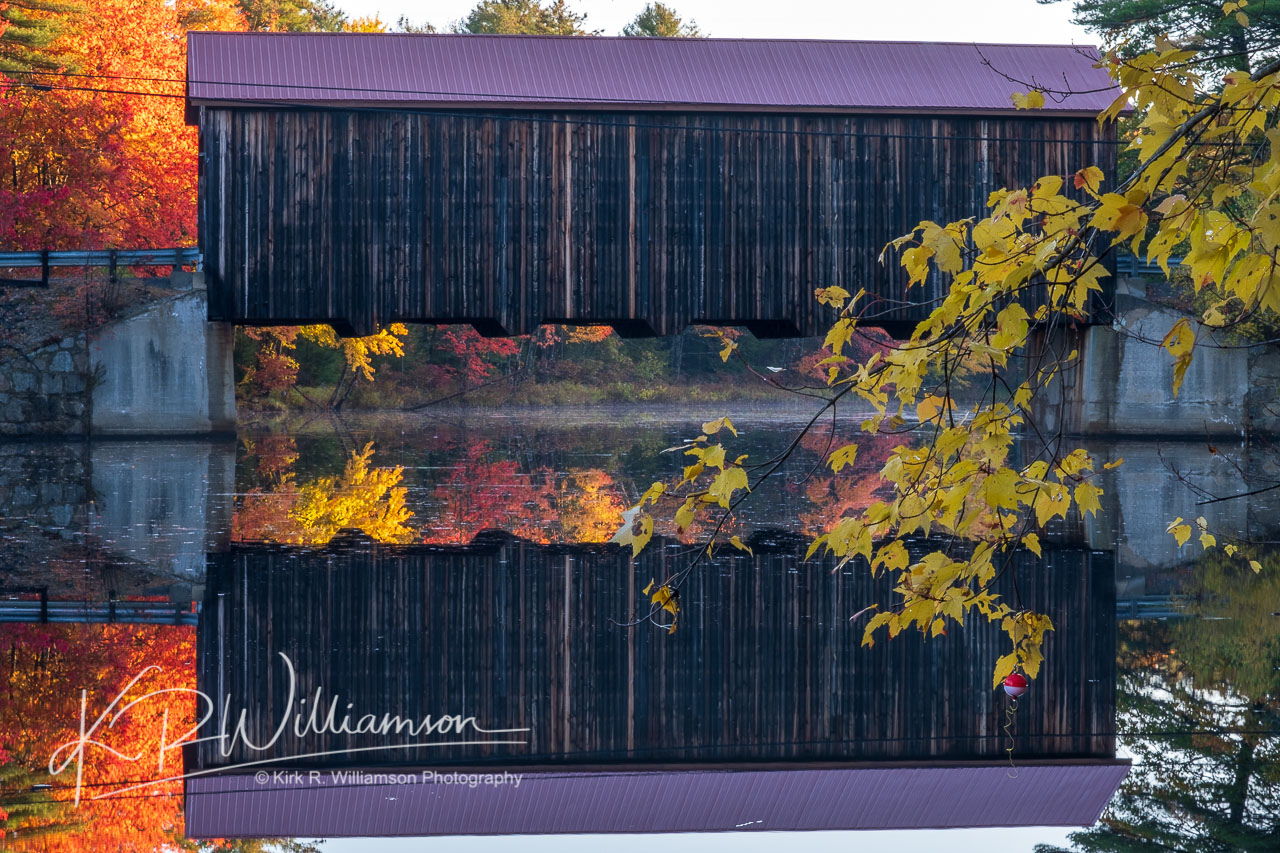
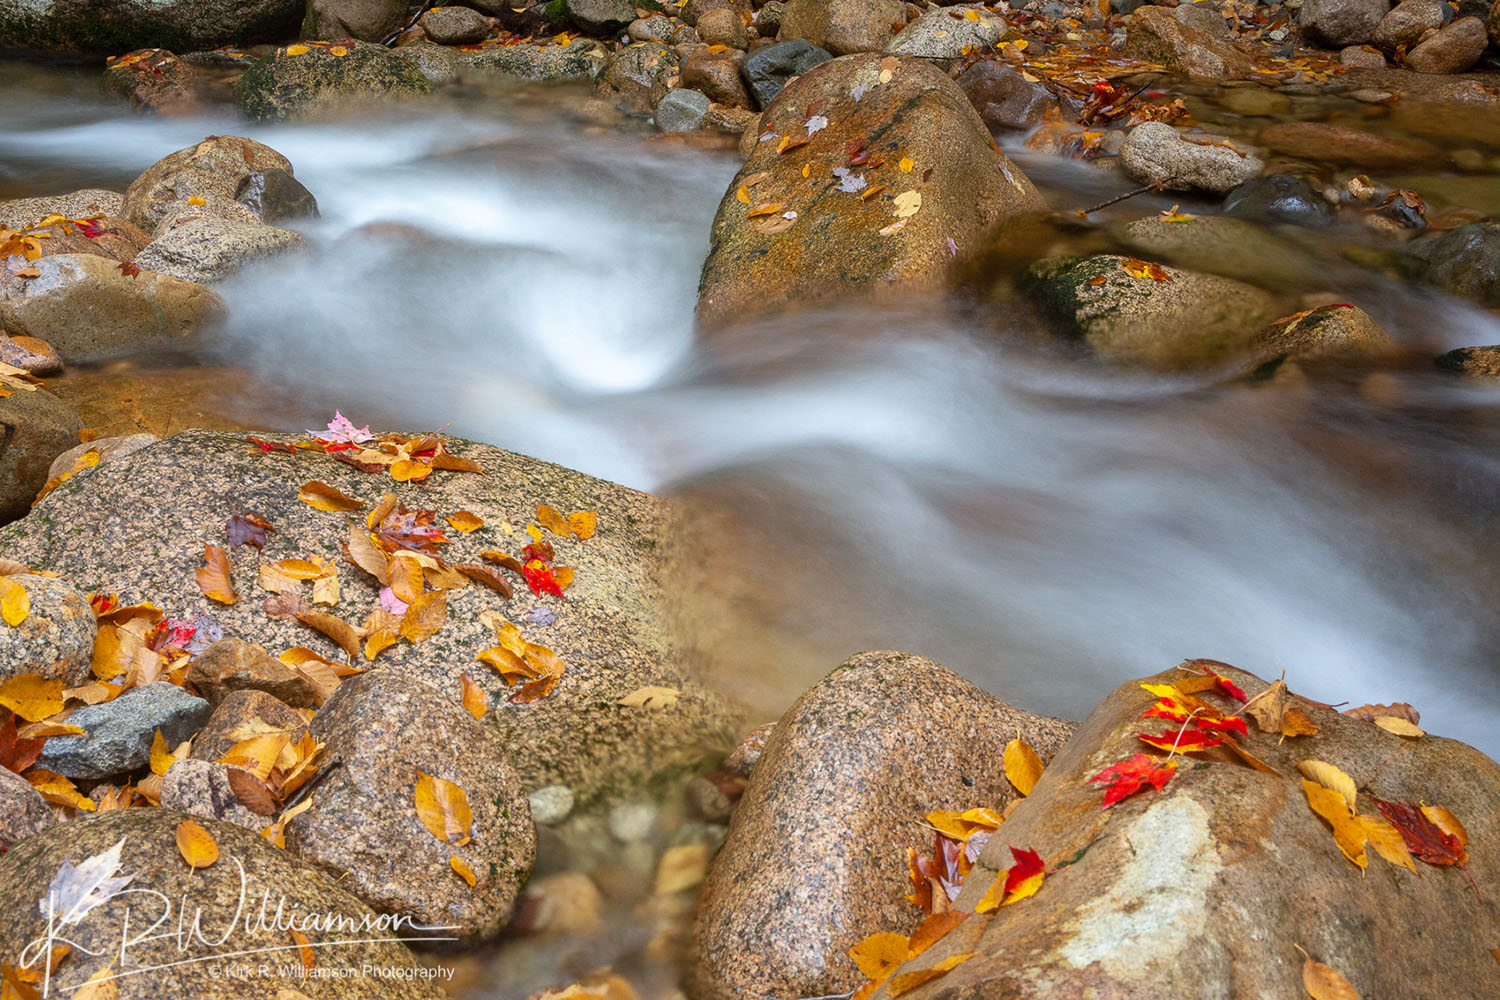
Tripping and almost falling while looking for good photographic view points is one of my strong suits! When I stumbled across this scene in Greenfield NH I knew the possibilities were outstanding. The obvious choice is to shoot the wide scene with all the colors surrounding the covered bridge. Last week a friend and I were up in southern New Hampshire and were faced with just such a shot. Make the obvious shot of course and even wait for the light to hit the leaves better and light things up even more. But, the more interesting shots can be abstract images made by thinking differently. Here is the obvious scene below.
Colorful foliage can be seen around the Hancock – Greenfield covered bridge in Geenfield New Hampshire.
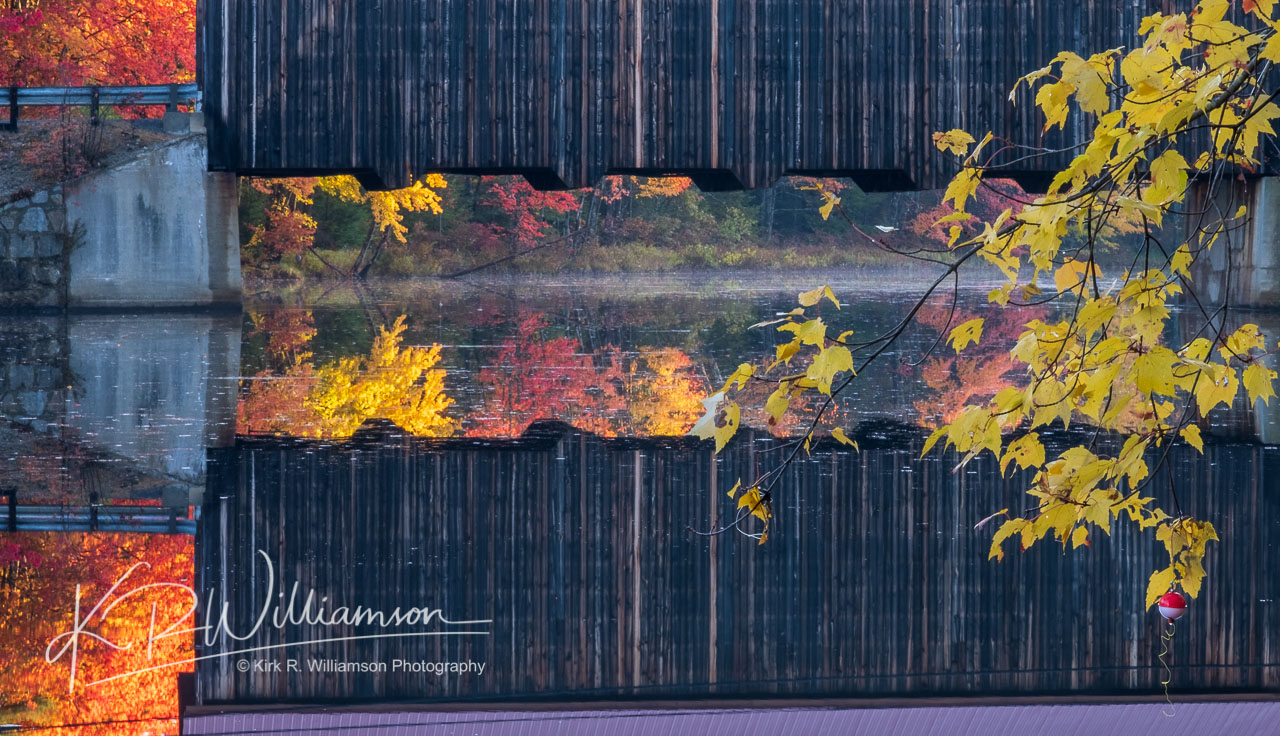
Did you notice the little surprise making this the quintessential New England image? In the right hand corner there is red and white fishing bobber that has gotten caught in the branch. How many times as a kid fishing in Maine did I do that? Here is a cropped version of the image above which I really like.
Colorful foliage can be seen around the Hancock – Greenfield covered bridge in Geenfield New Hampshire.
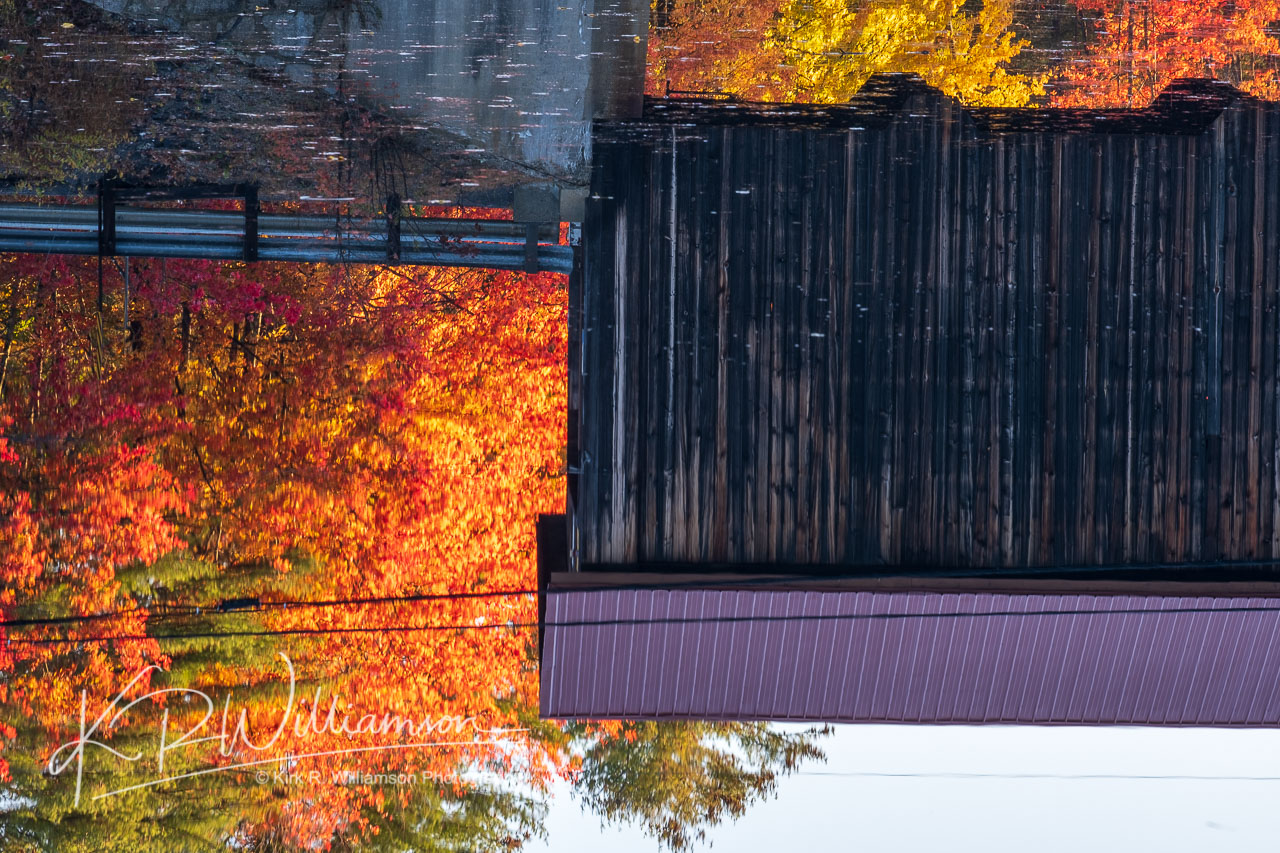
With the obvious images made it was time to look for abstracts! The image below is my absolute favorite.
Colorful foliage can be seen under the Hancock – Greenfield covered bridge in Greenfield New Hampshire.
The framing of the colorful fall leaves by the bottom of the covered bridge and its reflection make this image tops. A part of the scene as an abstract image what a concept. The next image is a little harder to pick up but it’s very interesting.
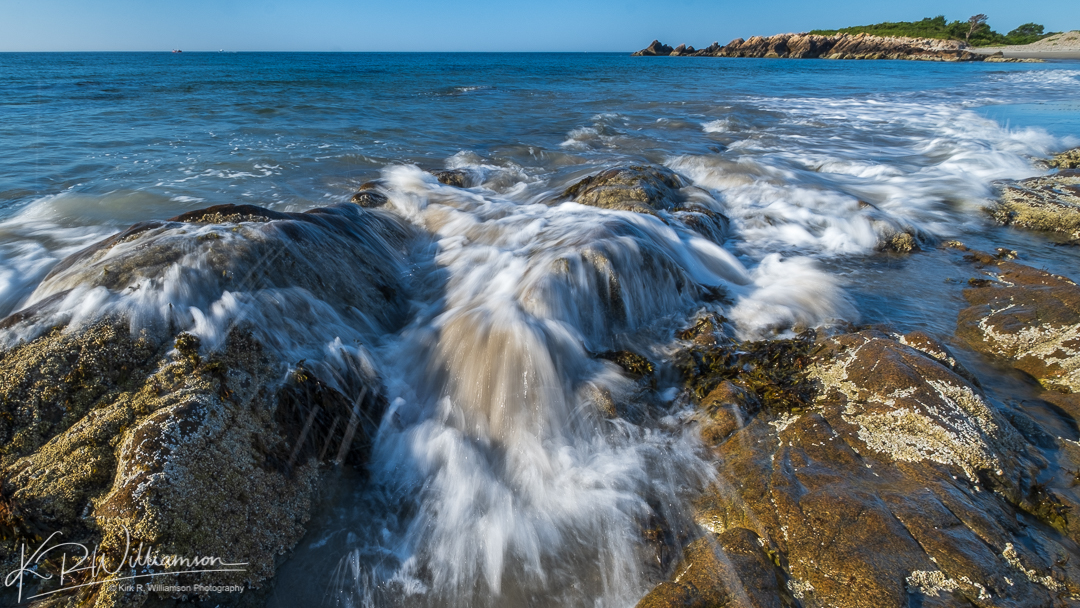
Colorful foliage can be seen in this reflection at the Hancock – Greenfield covered bridge in Greenfield New Hampshire.
This image is all reflection! If you look hard you can make out the water at the top of the frame. Some great images can be made if you look for parts of the obvious image as an abstract! So next time you are out shooting and faced with the obvious iconic image look for something different with a longer lens.
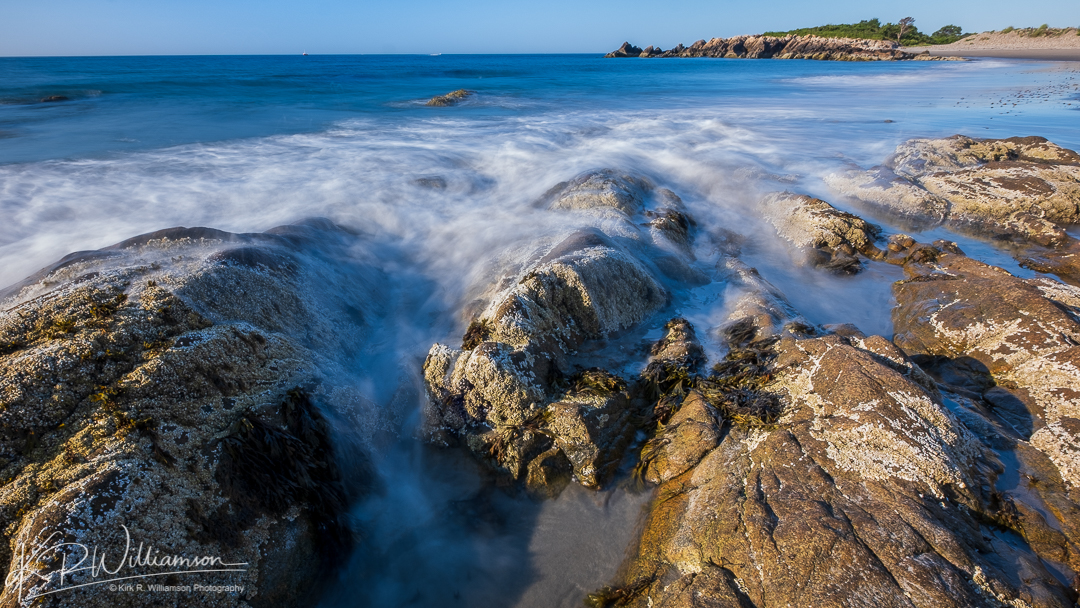
Earlier this week I ventured over to Cape Hedge Beach here in Rockport to photograph some rocks that are part of the beach. Interestingly this is not the case for the rest of the beach as there are no rocks bursting through the sand anywhere else. I loved the way they seemed to point to an outcropping of rocks further off in the distance and chose to use a slow shutter speed as the waves rolled in while the tide came in.
A series of rocks at Cape Hedge Beach in Rockport seem to point out to the end of the beach. ISO 160 1/10s f18
I started using my Breakthrough Photography six stop dark cpl which is a six stop neutral density filter with a polarizer in the same filter. I toned down the cpl and was able to use shutter speeds of one or two seconds. I prefer this one which was at 1/10 sec. at f18. The 2 sec. exposure covered the rocks with water and did not show the rocks pointing or leading the eye up in the frame to the spit of land in the distance. As far as images go it’s not the best but I kind of like it. I made a video of the experience on my YouTube channel which you can see below.
2 sec. exposure that defeated the purpose of the leading lines in the foreground.
This is one of the first things I teach my students. Learn to feel the light. How is it playing on subjects? According to Alfred Eisenstaedt “You sense the light with your eyes and respond with your emotions”. If you are always aware of light and how it reacts to the scene around you your decisions in photographing it are much better. So take the time and look at how light reacts to things around you. Just sitting reading a book, or in your car driving. Once you start really looking at the light you will begin to feel it.
Pre-visualize your subject
This next step is essential in getting consistent results with your photography. If you know what the final result will be you have a better chance of achieving it. I often give my students a 35mm slide mount painted flat black on one side white on the other. This method has been used for many years, mostly with a 4×5 frame card. I have used a larger 3:2 ratio cut out but it is far easier to carry around a small 35mm slide mount. So instead of using your camera use the slide mount to pre-visualize what you are going to shoot.
The critical part is knowing by instinct what you are going after and how you are going to get there. Very seldom do I make decisions while editing. I know before hand as I am shooting what I want. Part of my process is to decide before I shoot how I will crop, and post process the image. At this point it is instinctual. I know my camera and lenses so well that decisions on how the eventual image will look are done before I press the shutter. Now that being said, some tweaking in Lightroom may be required to gain that final vision.
People often ask me about my B&W work and do I shoot everything in color to start. Most of the time I will shoot in color so I don’t lose the option of having both. But I know beforehand what the final result will be. I like to shoot in B&W every once in awhile as it keeps me sharp and making my B&W pre-visualization sharp. With mirrorless cameras it is easier as you are looking at a B&W image in the view finder when set to monochrome.
Early morning light gives everything an incredible look.
Your Process
Once you have a repeatable process of making photographs you will begin to have repeatable results. If you learn one thing from this post its that last quote! I tell my students to develop there own repeatable process to making photographs. Let me explain. Do the same thing every time in the same order. Once you have this process down everything else becomes much easier. Here is my process which for you folks might be different.
Find your composition using slide mount or camera
Set your tripod up and mount the camera
Set your focus point
If using filters mount them and figure exposure
Check your composition and focus point
Make your first image
Check preview for exposure and focus
More exposures with different shutter speeds using live view
When I free form shoot, just walking about, my process is different when not using a tripod. I will try to make things easy by shooting in aperture priority and setting the ISO myself keeping in mind what my lowest allowable shutter speed is.
Leading lines – one of my favorite composition rules
Only use two or three composition rules
This may seem obvious to some but to others trying to use to many composition rules messes them up. I am hyper aware of only two. The Rule of Thirds and Leading Lines. My third go to is uneven numbers in a composition usually one or three. Simple and effective. There are tons of others which as far as I’m concerned are all just some form of my first two. So don’t get wrapped up in trying to find weird compositions just pick two or three and things will become a lot easier.
Practice
Just like anything else the more you do something the better you will become at it. I give my students things to practice on that will help them improve. My favorite is to have them tape their zoom lens on a certain focal length. My favorite is to make them shoot at 50mm only. This is a tough focal length since most people shoot with a 28mm as their main lens. Most zoom lenses are 28 – 70 or longer. Once you practice at one focal length you will start to see differently. Another thing I preach is to always have a camera with you. If you do you will always be ready for an image that just begs to be taken. Plus you will be making more images and therefore practicing more. So practice makes perfect is a great motto for photographers. Now that being said don’t practice the same thing all the time. Shoot different things to challenge yourself. Different focal lengths, different lighting, different subjects.
If you keep these five things in mind you are bound to become a more consistently good photographer. The hardest one of these five things is your process. Once you get this one thing down making great images consistently will become easier.