This is one of the first things I teach my students. Learn to feel the light. How is it playing on subjects? According to Alfred Eisenstaedt “You sense the light with your eyes and respond with your emotions”. If you are always aware of light and how it reacts to the scene around you your decisions in photographing it are much better. So take the time and look at how light reacts to things around you. Just sitting reading a book, or in your car driving. Once you start really looking at the light you will begin to feel it.
Pre-visualize your subject
This next step is essential in getting consistent results with your photography. If you know what the final result will be you have a better chance of achieving it. I often give my students a 35mm slide mount painted flat black on one side white on the other. This method has been used for many years, mostly with a 4×5 frame card. I have used a larger 3:2 ratio cut out but it is far easier to carry around a small 35mm slide mount. So instead of using your camera use the slide mount to pre-visualize what you are going to shoot.
The critical part is knowing by instinct what you are going after and how you are going to get there. Very seldom do I make decisions while editing. I know before hand as I am shooting what I want. Part of my process is to decide before I shoot how I will crop, and post process the image. At this point it is instinctual. I know my camera and lenses so well that decisions on how the eventual image will look are done before I press the shutter. Now that being said, some tweaking in Lightroom may be required to gain that final vision.
People often ask me about my B&W work and do I shoot everything in color to start. Most of the time I will shoot in color so I don’t lose the option of having both. But I know beforehand what the final result will be. I like to shoot in B&W every once in awhile as it keeps me sharp and making my B&W pre-visualization sharp. With mirrorless cameras it is easier as you are looking at a B&W image in the view finder when set to monochrome.
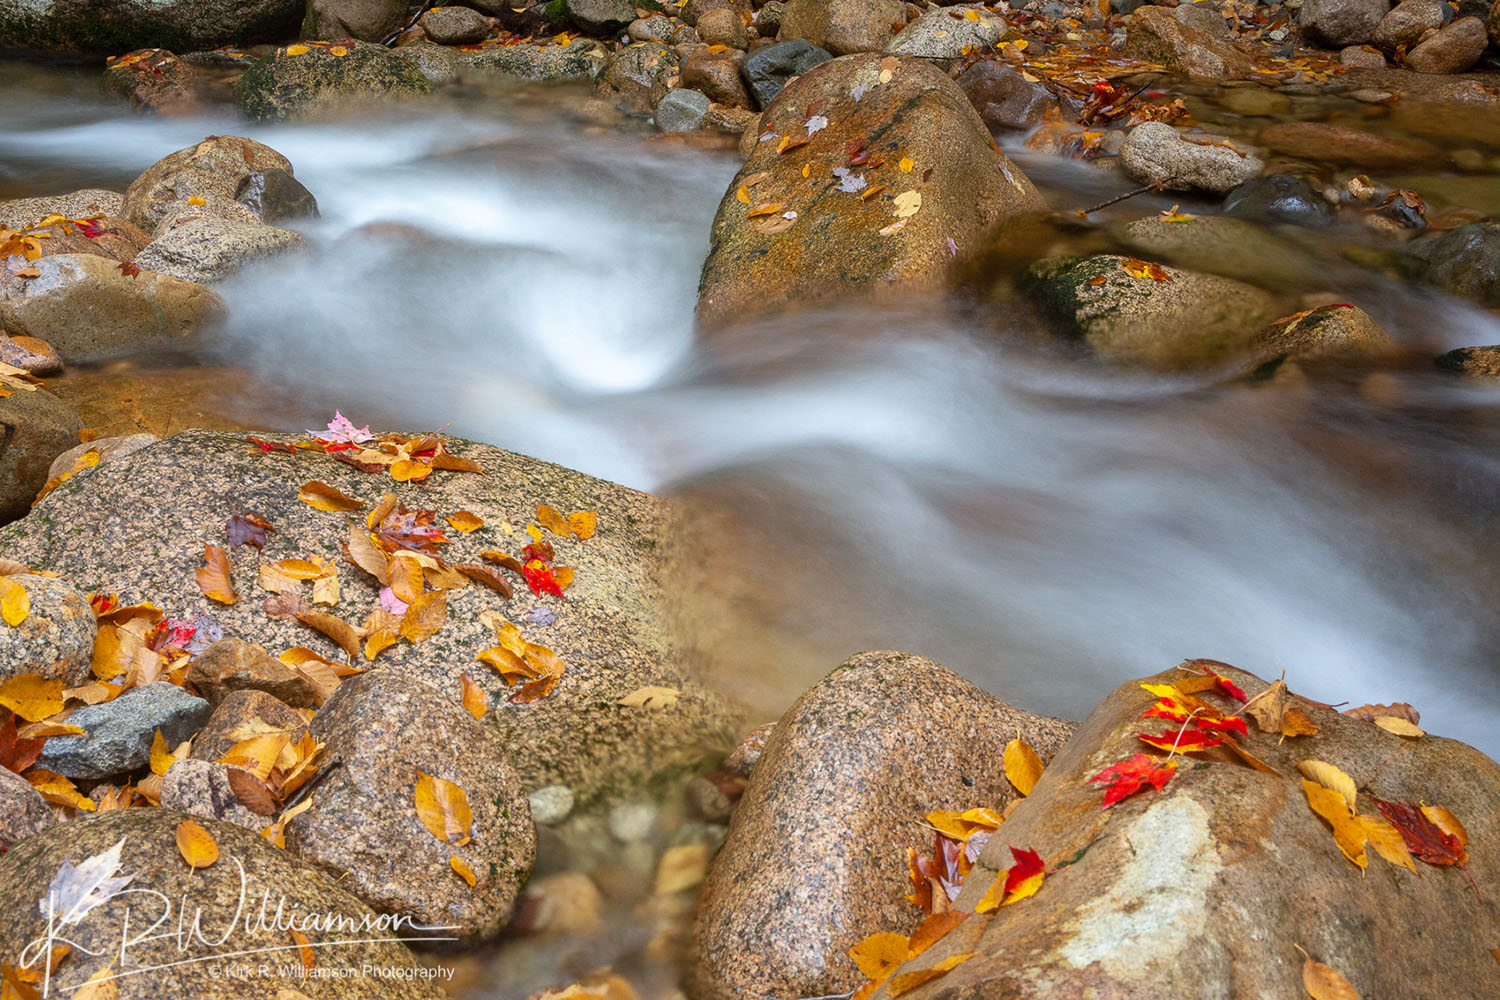
Early morning light gives everything an incredible look.
Your Process
Once you have a repeatable process of making photographs you will begin to have repeatable results. If you learn one thing from this post its that last quote! I tell my students to develop there own repeatable process to making photographs. Let me explain. Do the same thing every time in the same order. Once you have this process down everything else becomes much easier. Here is my process which for you folks might be different.
Find your composition using slide mount or camera
Set your tripod up and mount the camera
Set your focus point
If using filters mount them and figure exposure
Check your composition and focus point
Make your first image
Check preview for exposure and focus
More exposures with different shutter speeds using live view
When I free form shoot, just walking about, my process is different when not using a tripod. I will try to make things easy by shooting in aperture priority and setting the ISO myself keeping in mind what my lowest allowable shutter speed is.
Leading lines – one of my favorite composition rules
Only use two or three composition rules
This may seem obvious to some but to others trying to use to many composition rules messes them up. I am hyper aware of only two. The Rule of Thirds and Leading Lines. My third go to is uneven numbers in a composition usually one or three. Simple and effective. There are tons of others which as far as I’m concerned are all just some form of my first two. So don’t get wrapped up in trying to find weird compositions just pick two or three and things will become a lot easier.
Practice
Just like anything else the more you do something the better you will become at it. I give my students things to practice on that will help them improve. My favorite is to have them tape their zoom lens on a certain focal length. My favorite is to make them shoot at 50mm only. This is a tough focal length since most people shoot with a 28mm as their main lens. Most zoom lenses are 28 – 70 or longer. Once you practice at one focal length you will start to see differently. Another thing I preach is to always have a camera with you. If you do you will always be ready for an image that just begs to be taken. Plus you will be making more images and therefore practicing more. So practice makes perfect is a great motto for photographers. Now that being said don’t practice the same thing all the time. Shoot different things to challenge yourself. Different focal lengths, different lighting, different subjects.
If you keep these five things in mind you are bound to become a more consistently good photographer. The hardest one of these five things is your process. Once you get this one thing down making great images consistently will become easier.
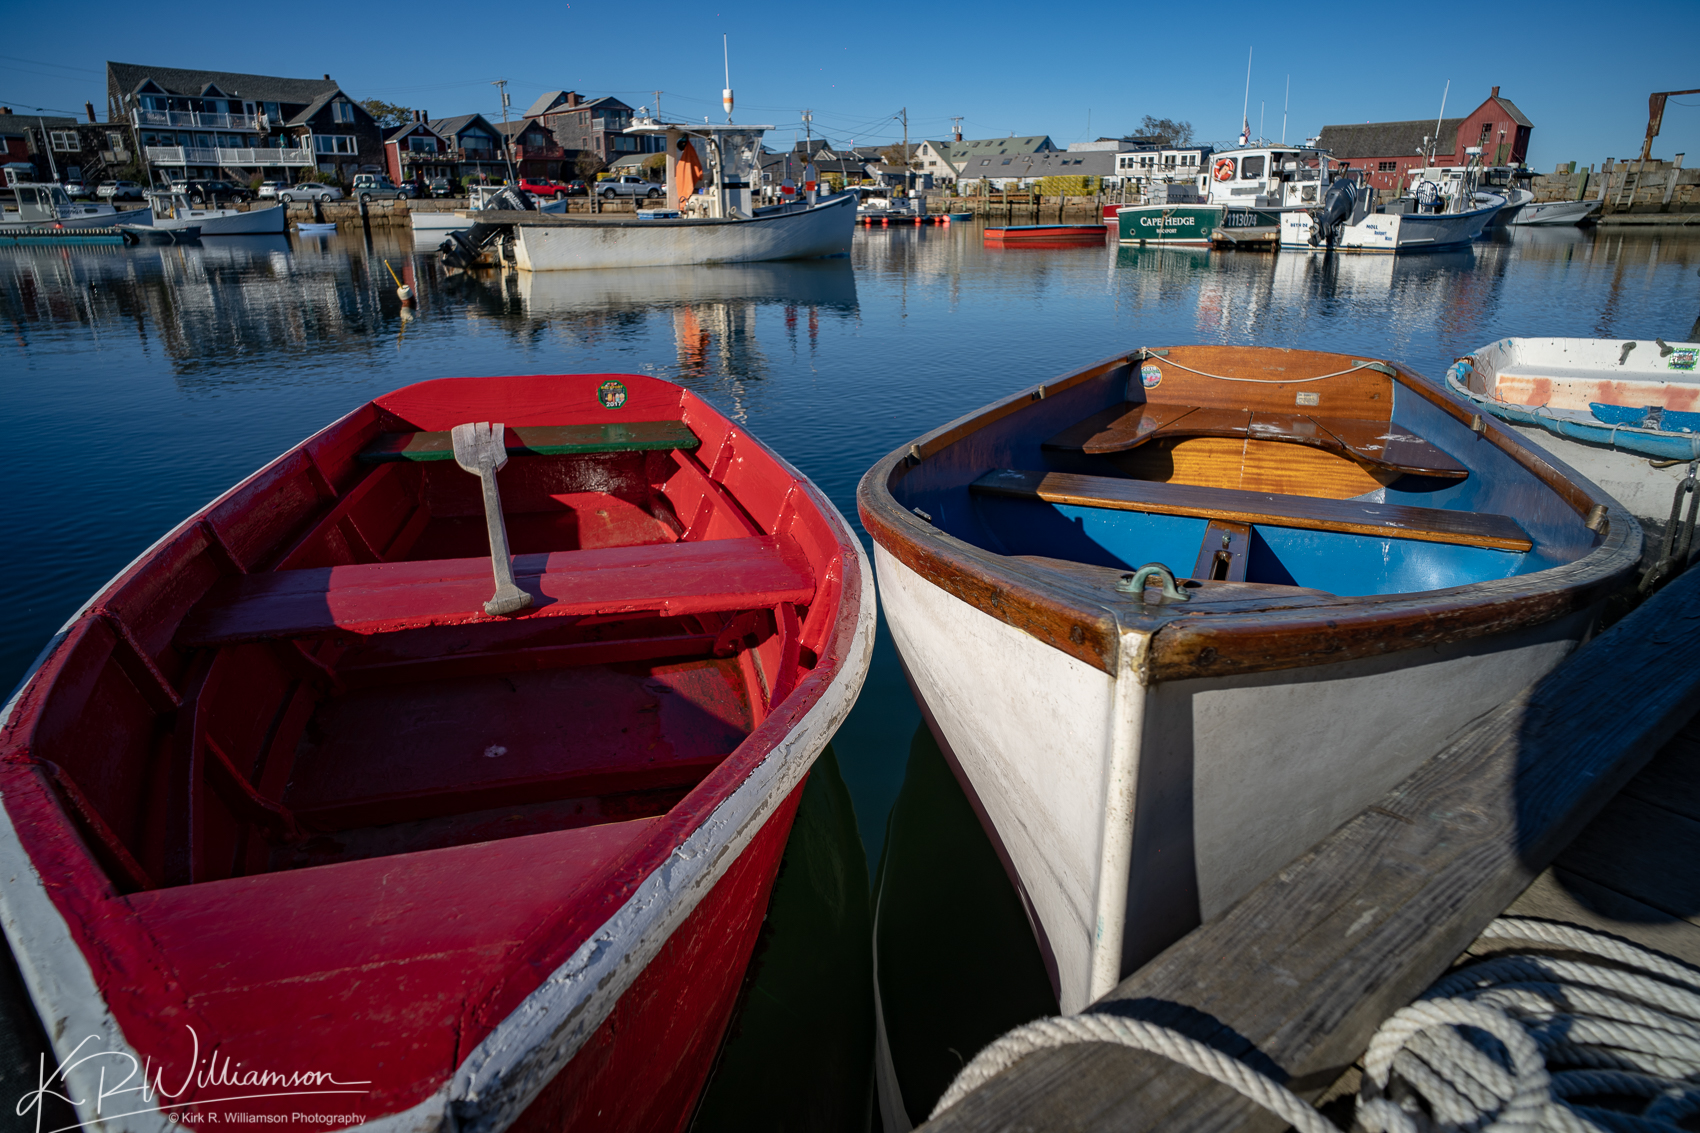
Dinghy’s tied up along the waterfront in Rockport, MA. Leica 21mm Super Elmar
Introduction
The mirrorless debate has started to fester inside my decidedly Canon fanboy brain now for about a year or so. I purchased a Sony a6300 over a year ago and have not regretted it. But that being said I love my Canon’s, a 5D Mk3 and a 7D Mk2. I have used Canon for my whole professional life which spans now over 40 years! The lenses are superb and have never failed me. When the Sony a7lll came out I was intrigued as this camera looked incredibly awesome. So I read as much as I could and finally decided to rent it for four days to see if it really was what it seemed. My biggest problem was not the camera but the two days of rain that interrupted my shooting with it. Thus I only got to shoot with my 24-70 f4L and only two Leica lenses the 21 Super Elmar and the 50 f1.4 Summilux. The Canon 16-35 f2.8L lll, 70-200 f2.8L ll, 300 f2.8L and 100 f2 and my other Leica glass sat in the bag, very frustrating!
My main reasons for renting the Sony a7lll were to see how these lenses would perform on a full frame Sony with adapters. The biggest complaint had been that non-native ultra wide M lenses performed poorly wide open in the corners. I have a Leica 21mm Super Elmar and I especially wanted to see how this lens would do with the Novoflex adapter. I use it on my Sony a6300 and it performs great but is only a 30mm with the crop.
Canon lenses with the Sigma MC-11 adapter
I found this adapter, which I purchased from B&H Photo, to be an excellent adapter. The best thing about it was that at the time it was only $150. It has a firmware port on the side for updates and is fully compatible with Canon EF mount lenses. The focusing with this adapter is flawless. It is fast, responsive, and accurate.
Autumn mums along Bearskin Neck. Canon 24-70 f4L @24mm
The only difference that I can find between it and using native Sony glass is that I can’t activate lock on focus in Servo continuous focus mode. Other than that it’s great. I set the a7lll to back button focus by turning off focus with shutter release. I tried a few of the focus modes and settled on flexible spot using Sony’s new joystick to move it around the viewing area. The only problem with this method was that when the camera was down at my side using the Peak strap system I would hit the joystick by accident. This would move the focus point into a corner and the next time I pulled the camera around to shoot it was a issue.
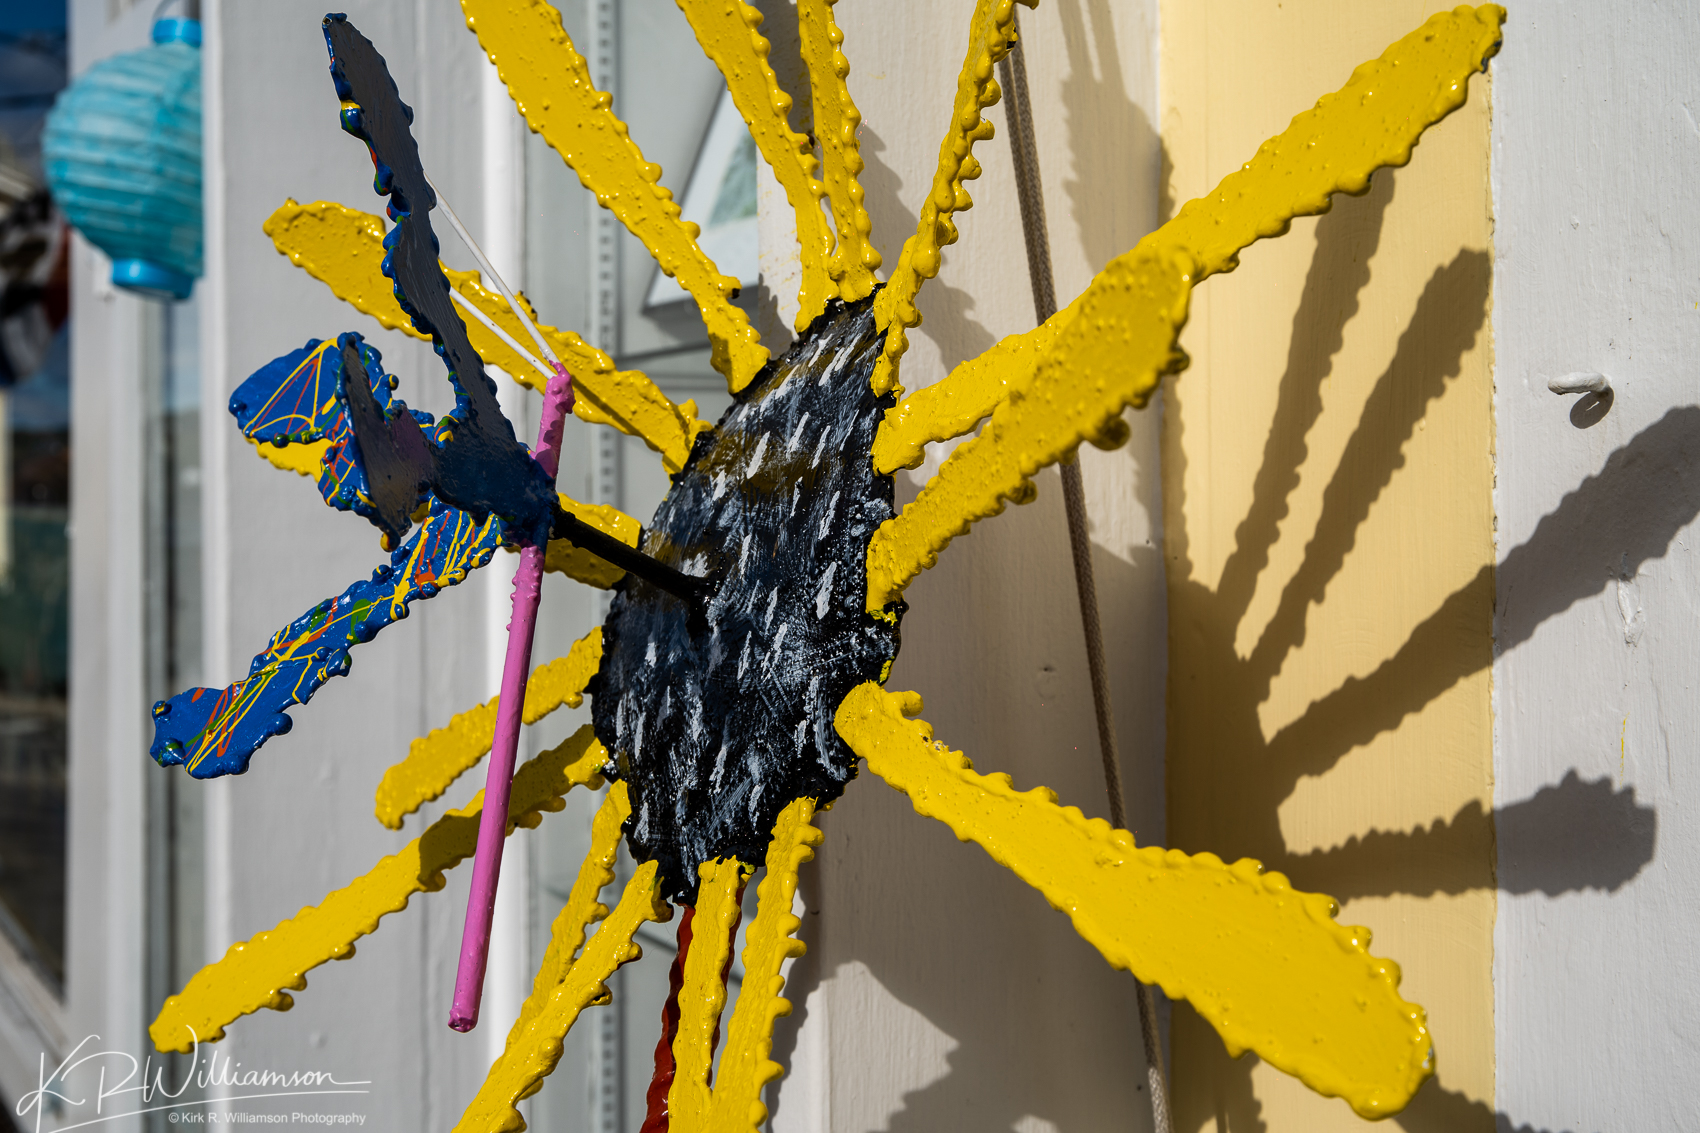
An artists sculpture of a sunflower. Canon 24-70 f4L @ 50mm
I was curious about the focus speed with the Sigma MC-11 combination. I knew that with my a6300 it performed really well in this regard. I recently photographed a girls field hockey game with it and was pleasantly surprised (more on that at a later time). The focus speed with the adapter on the Sony a7lll was close to my Canon 5D mklll. I was a bit surprised but for most of my purposes this works incredibly well. Using it for my professional work would be an issue as the size of the lens – adapter combination is a problem. It’s huge! It kind of negates the reason for using the Sony a7lll. But for landscape work and just about anything else it works great.
The colors really pop out on a quarry wall in Rockport, MA. Canon 24-70 f4L @70mm
I was lucky to get out and shoot along the waterfront and up in the quarries in Rockport with my 24-70 f4L. Besides the size of the lens/adapter combination it performed very well. The focusing was perfect and the experience was a pleasure. My exposures were right on the nose as you can tell by seeing the results through the EVF. The combination of the Canon lenses and the Sony a7lll were pretty close to a dream combo if it were not for the size issue.
A lobster boat sits at the town wharf in Rockport, MA.
The only thing I did not have a chance to do was mount this rig on a tripod. The problem here would be that the Sigma MC-11 adapter does not have a tripod mount which is an issue since the rig is pretty big. Mounting the camera on a tripod with this lens/adapter combo could be an issue with the 24-70 and the 16-35 because they are rather large anyway. The 70-200 is not an issue as it has a tripod collar. The Metabones Canon EF to E mount adapter does have a tripod mount on it but at $399 vs $250 it’s way more money. I have read the performance is about equal, interesting.
My golden retriever “Kodak” takes a mid day snooze on the couch. Canon 24-70 F4L
Novoflex Leica M to Sony E mount
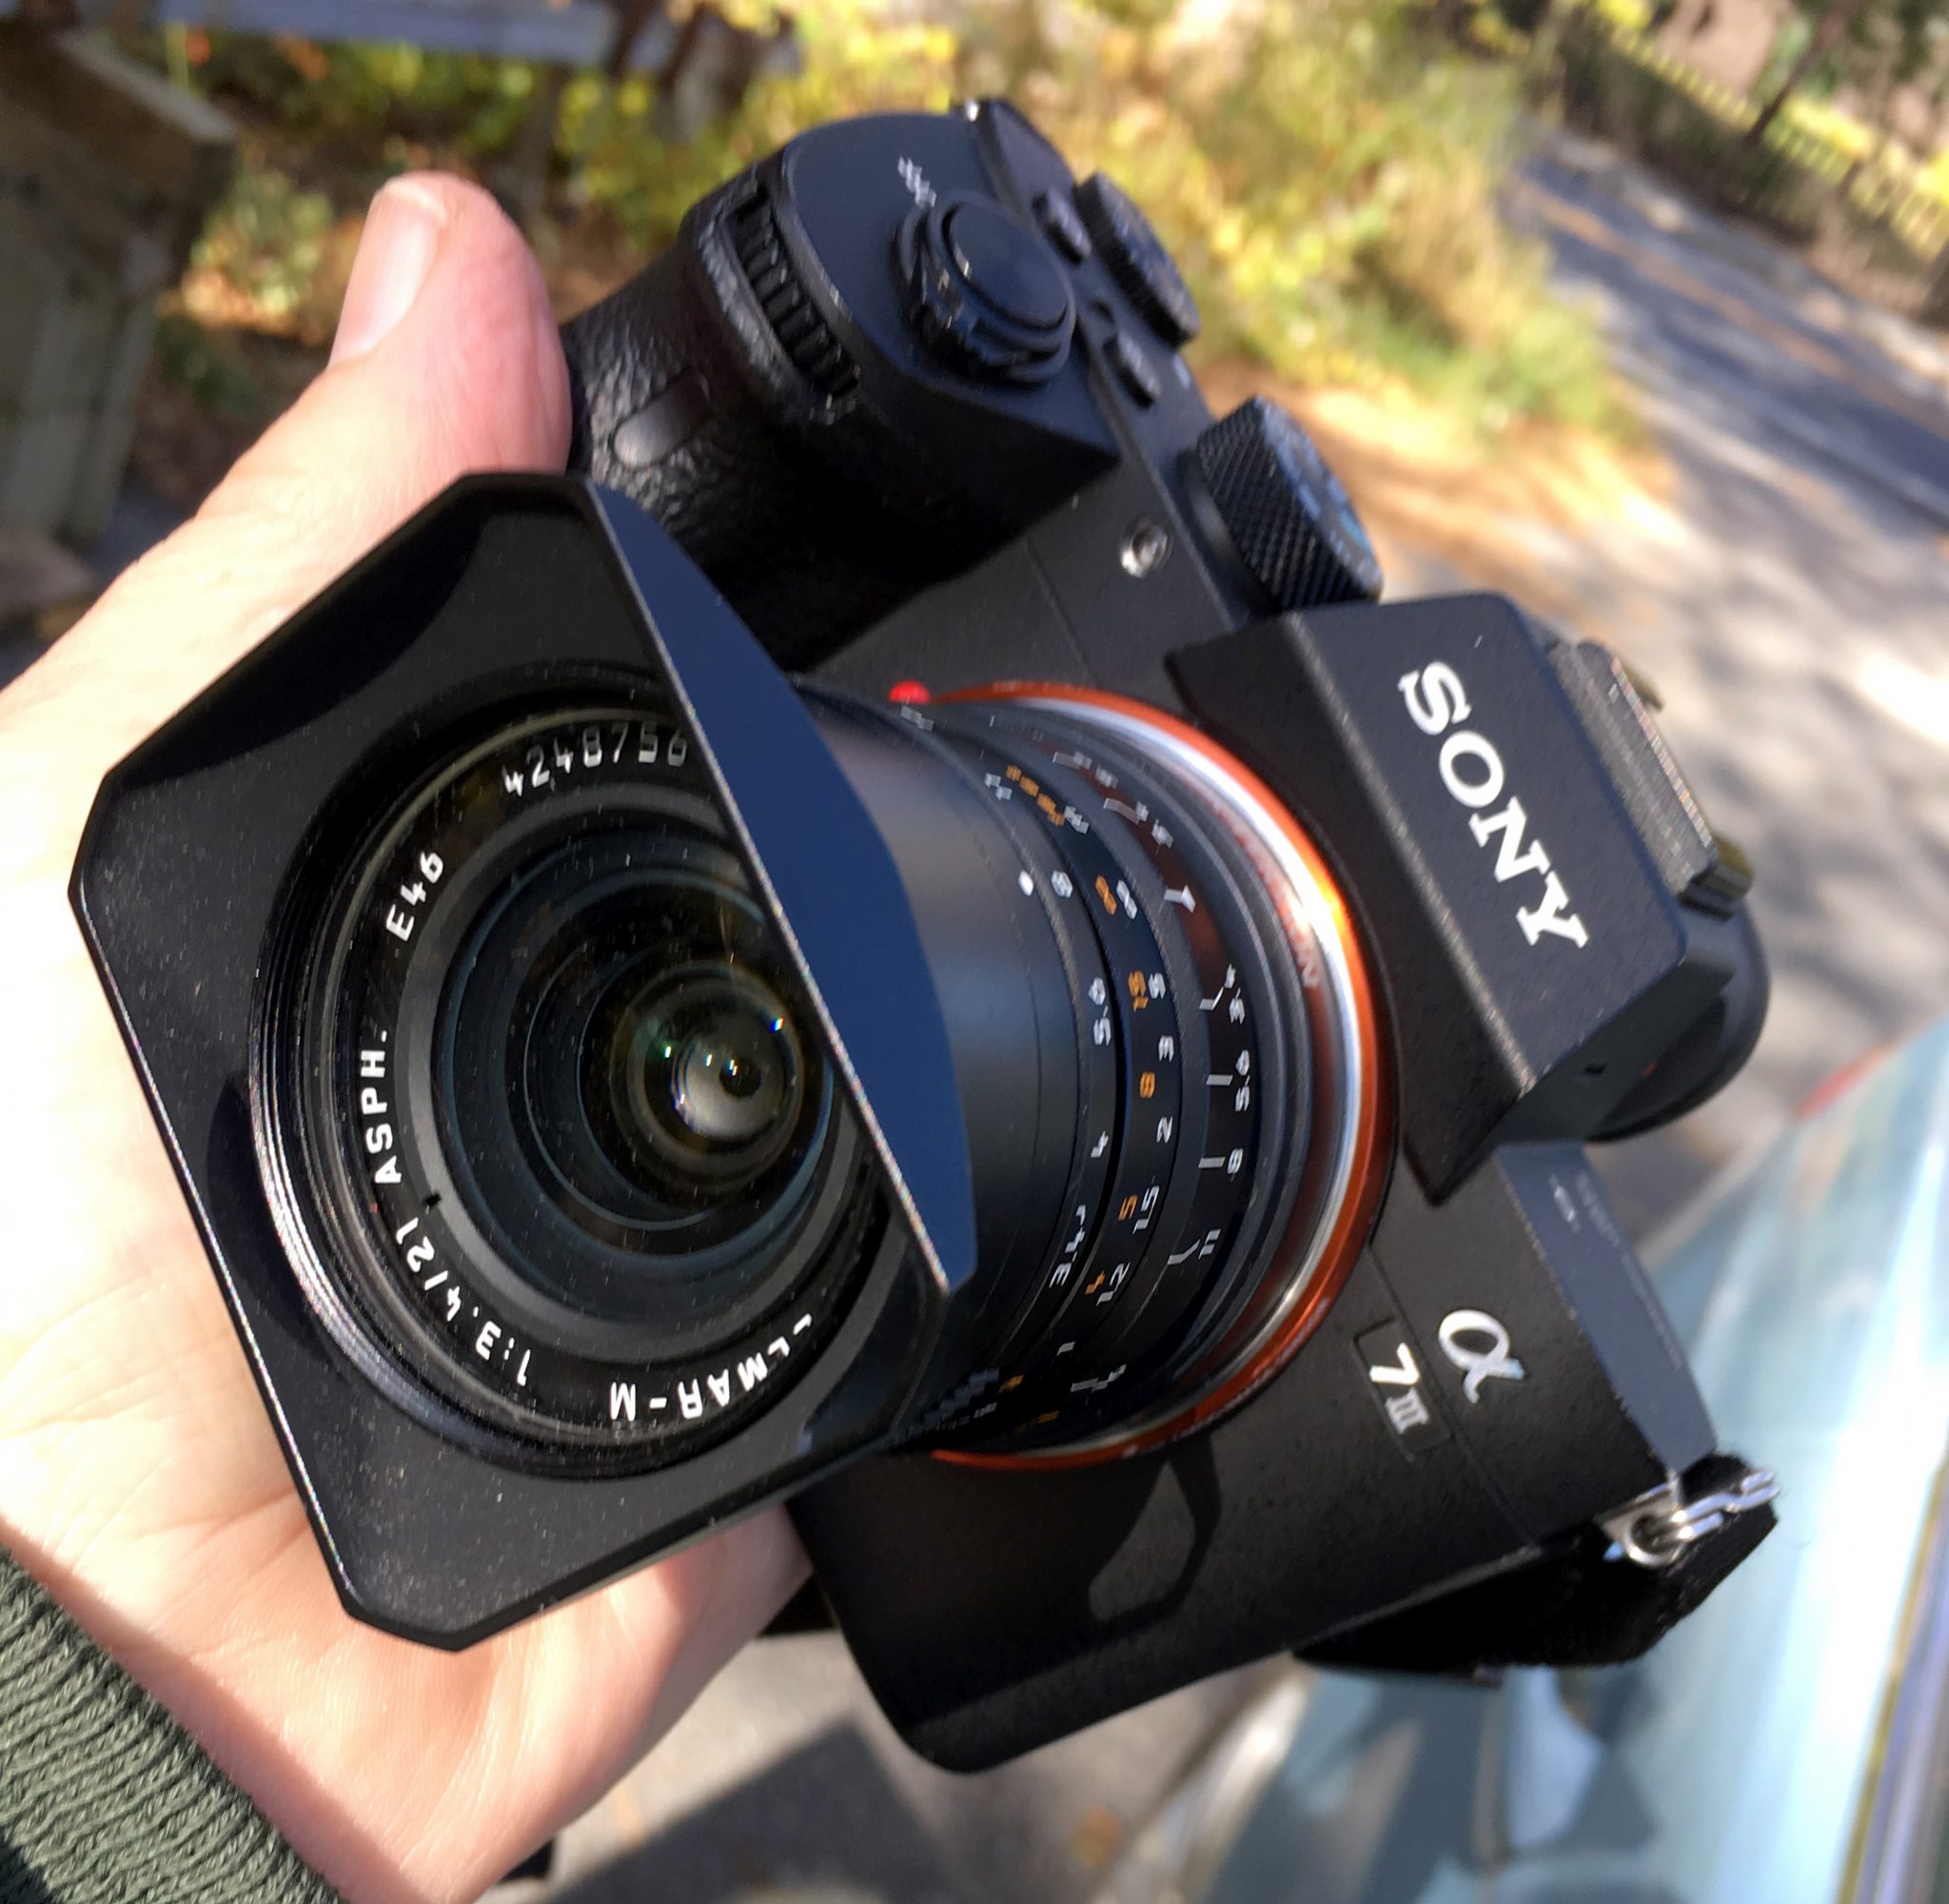
The Sony a7lll with the Novoflex adapter and Leica 21mm Super Elmar
I have owned this adapter for a couple of years now. I started with a terrible Metabones $89 version that was so tight I could barely get the lens onto it. So I sent it back. I found a used version (like new) of the Novoflex adapter on Fred Miranda and purchased it for a decent price. It sells now for $205 on B&H. There are many other adapters for Leica M to E mount but they are not even close to the quality of this one. The German machining is exquisite which means it works flawlessly – for a dumb (no electronic coupling) adapter. Does it seem overpriced, ya well maybe. I have used it on my Sony a6300 for the past two years and it is an excellent adapter, a nice wiggle free fit. But this is about how it works on the Sony a7lll not the a6300.
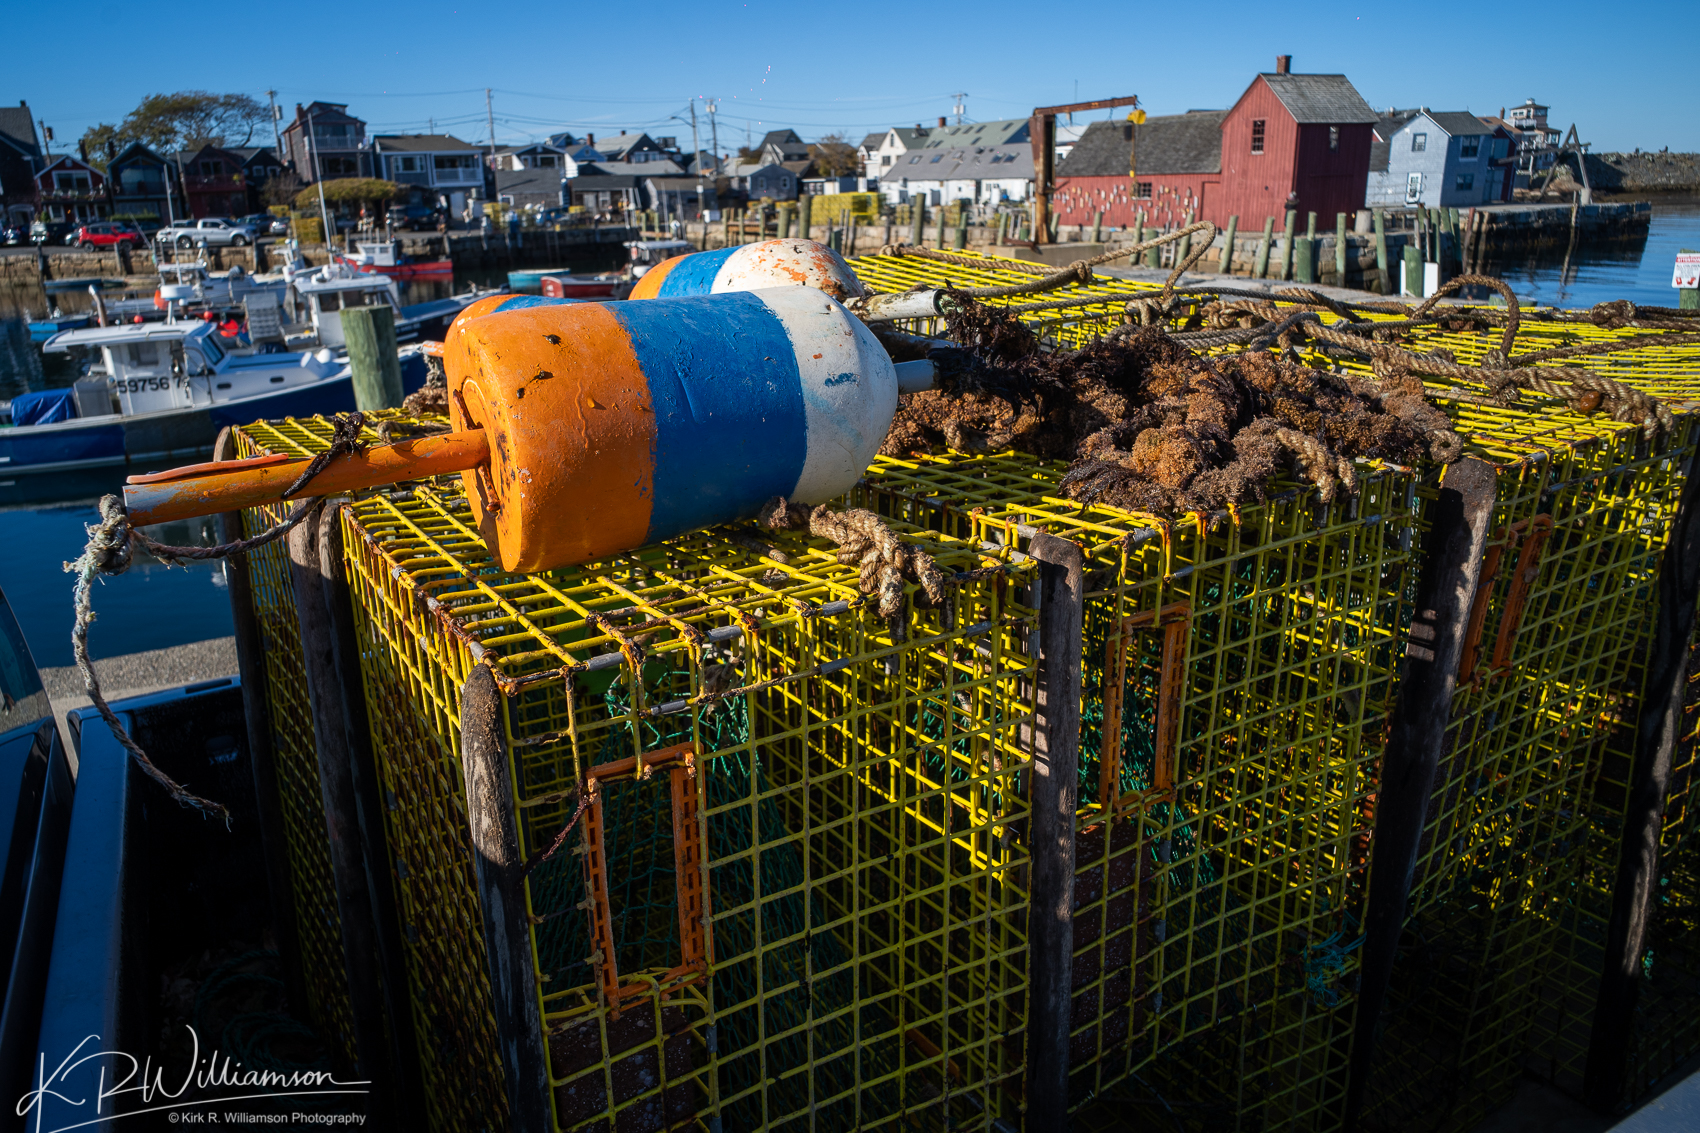
Hauled traps sit in the back of a truck with the Motif in the background. Leica 21mm Super Elmar
I started right away with the Leica 21mm Super Elmar as it is one of my favorite lenses. The contrast, sharpness, and overall look are outstanding. I set the camera to shoot in shutter priority and auto ISO. I did play around with the ISO some just to see if things were working like I expected. They were. I had read the biggest concern with using Leica M lenses on the a7 series cameras was that the corners tended to get a bit fuzzy with the f stop to wide open because of the curvature of the rear element and it’s close proximity to the sensor. I did some experimenting and the particular combination of the Leica 21 SE and the Sony a7lll is not as bad as written about. Yes, the softness is there, but clearly things have gotten better since the first a7. At some point I will try it on the a7Rlll. Who knows it may be even better. As soon as I stopped down to f5.6 it was completely gone. You can see some of this fuzziness going on in the bottom corners in the photo below. It’s there but I can deal with it. Hell it’s a 21mm so if you want everything sharp shoot above f5.6 and focus closer to the foreground.
Dinghy’s are tied up along the waterfront in Rockport, MA. Leica 21mm Super Elmar
The best thing about these manual focus lenses is they have a distance and f- stop scale printed on the front. A very useful tool. I set the Sony up to do a number of different things to help me with the manual focus. First I set focus assist magnification to on. I then set the C3 button to activate the focus assist magnification. Then I set focus peaking to the color red and to low intensity. Using focus peaking is difficult to get used to but worth the practice. I found that focusing wide open gives you a better idea of what’s in focus. After I do this I move the f stop to where I want it. It’s pretty cool see your focus plane move back and forth as you focus. Focusing at your chosen f stop gets more difficult as you get up past f8 depending on the lens. The focus peaking needs to be the thickest at your point of focus otherwise your focus will be off.
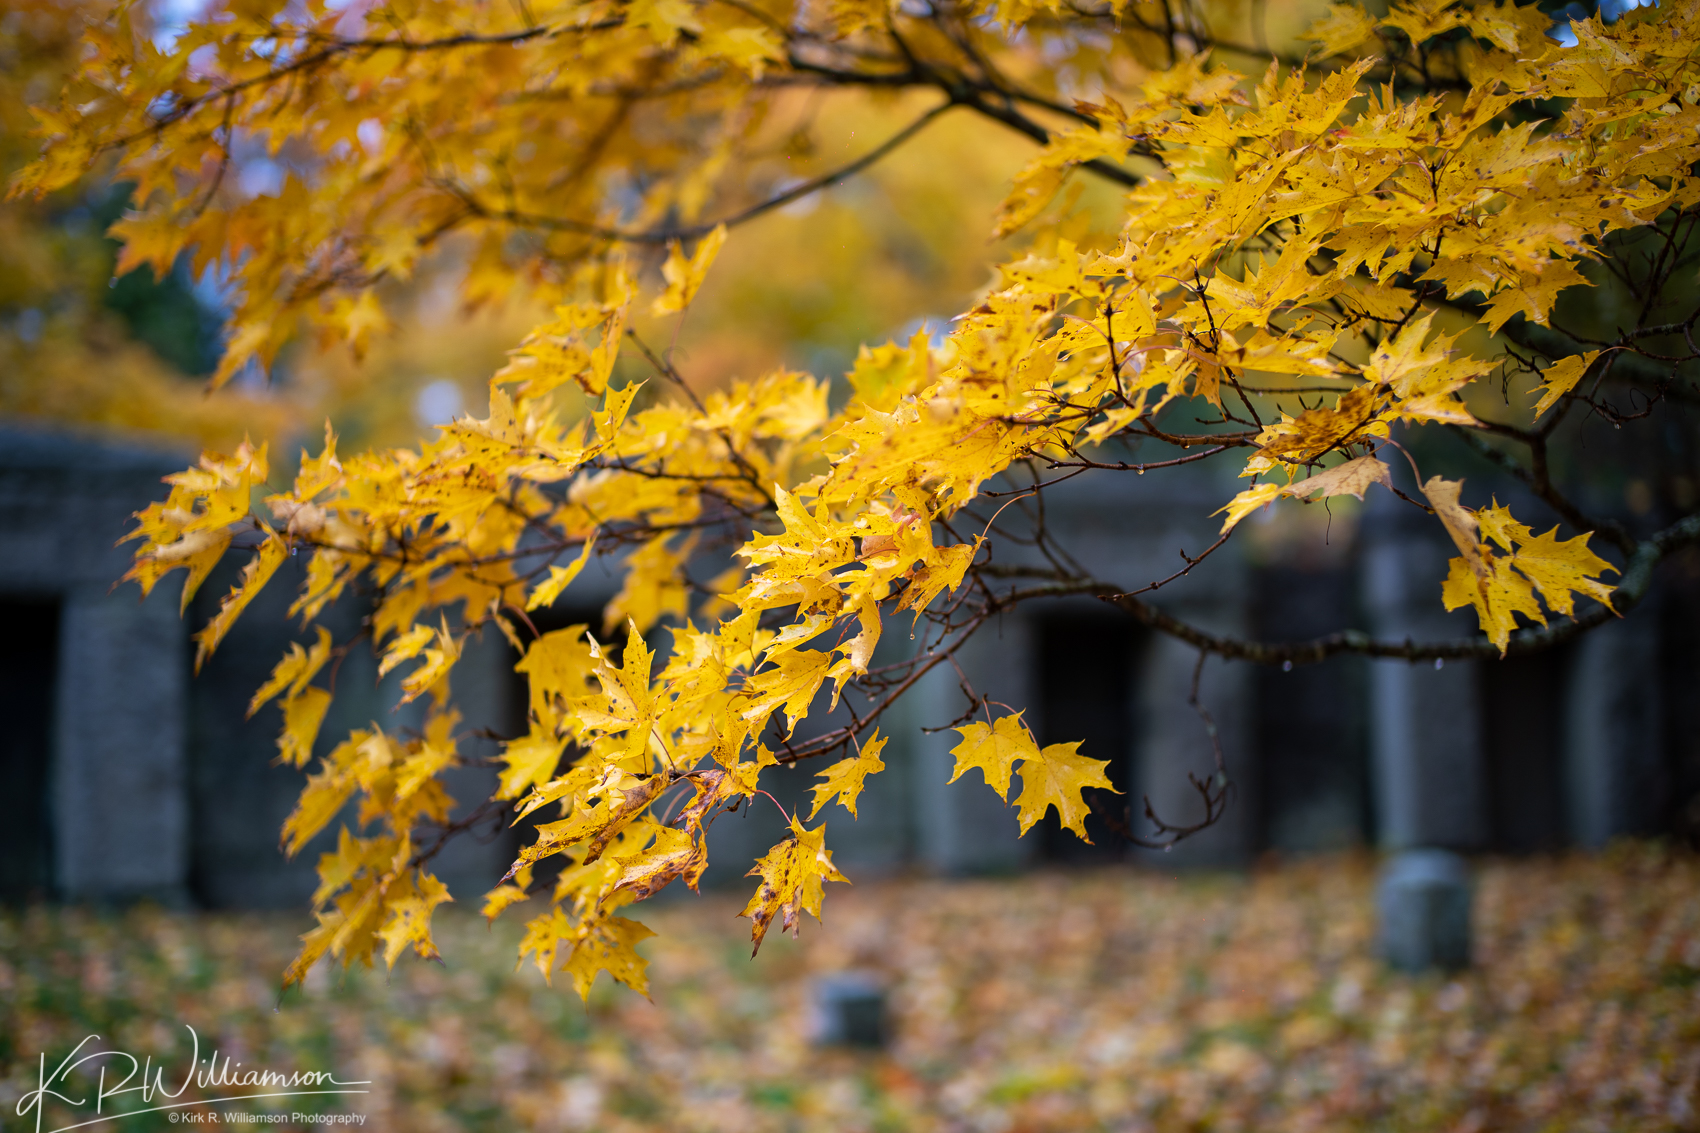
Autumn leaves adorn a cemetary in Ipswich, MA Leica 50mm Summilux @ f1.4
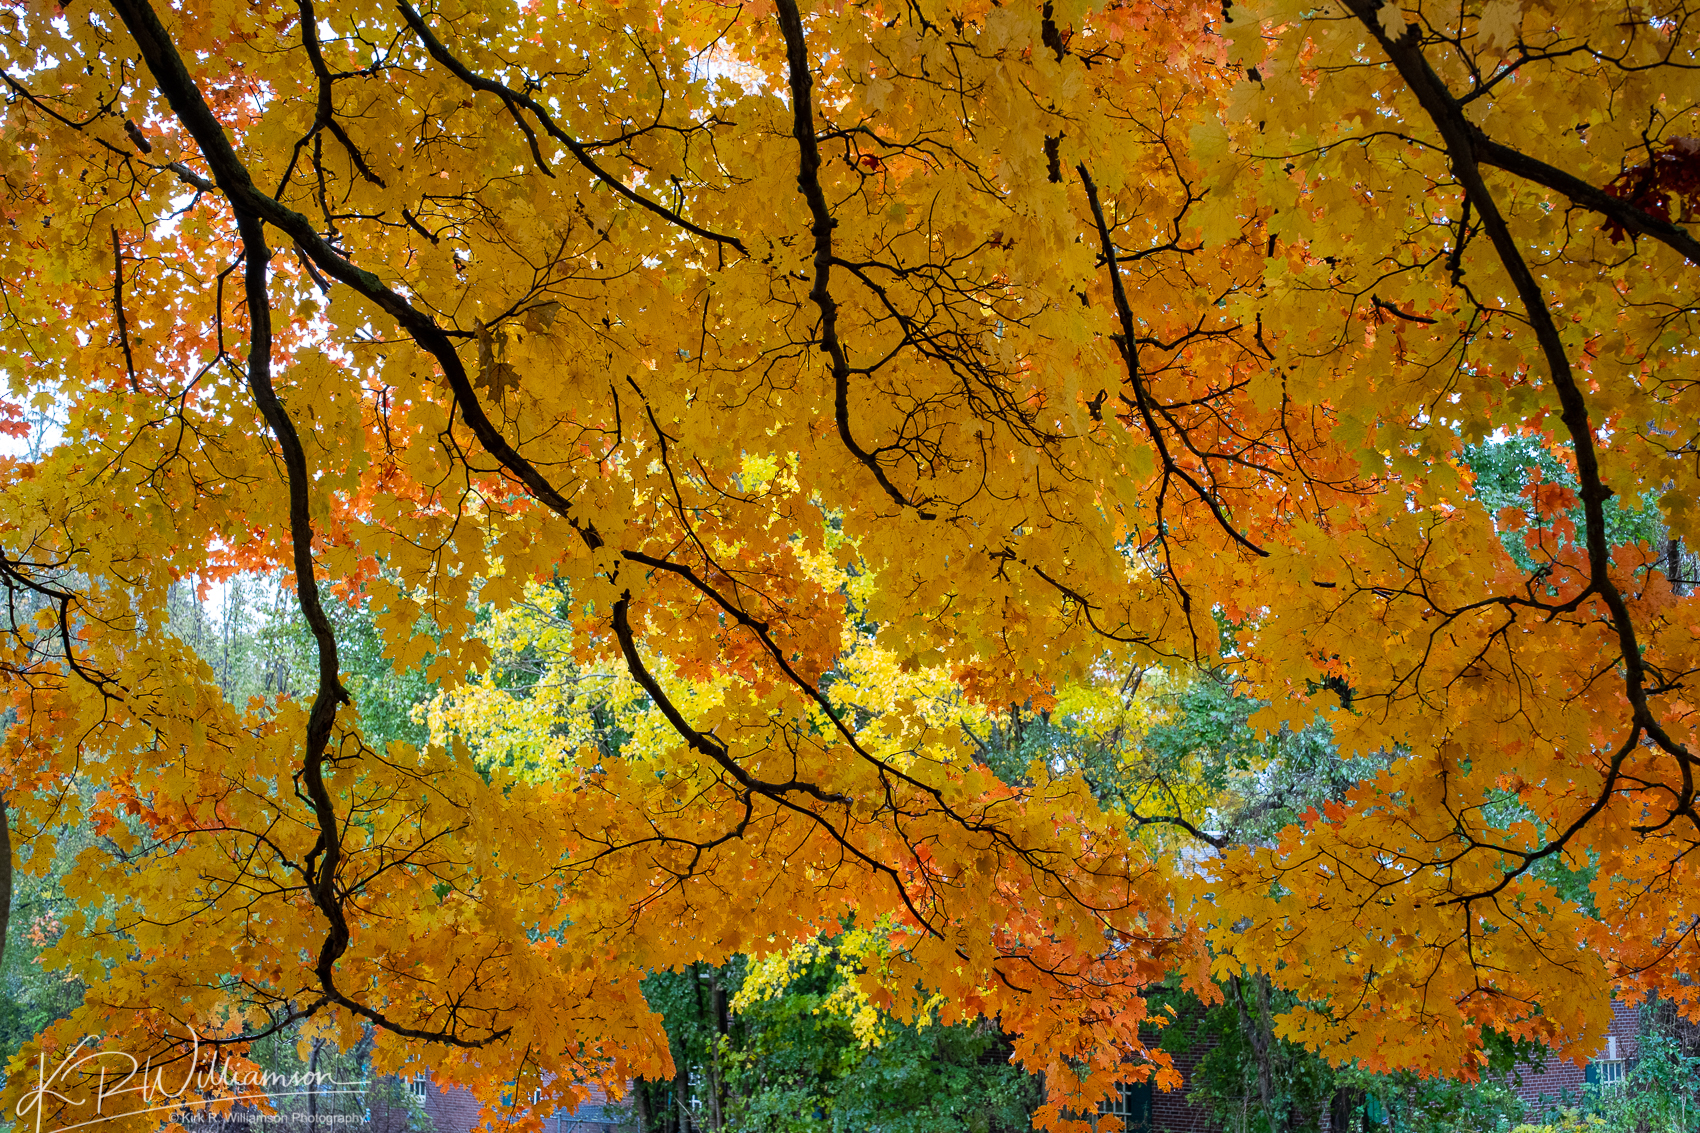
The image below was shot at f8 and it was a mighty struggle getting the focus just right as the whole tree looked like it was in focus with focus peaking. So I focused at f1.4 and then changed it to f8 before making the shot. Leaving the ISO on auto really helps using this method.
Looking at the autumn color from underneath the tree provides a different prospective. Leica 50 mm Summilux @ f8.
Being able to use these Leica prime lenses on a superb sensor was a real treat. I like to take one lens out and shoot with one option moving my feet instead of zooming. Focusing myself is a pleasure and brings me back to a simpler time in photography. Lastly, I leave you with this B&W conversion of a fence I encountered along the way in a morning walk in Ipswich, MA. It was pretty easy to focus on the pickets in the front with focus peaking not a bunch of leaves.
Weathered fence waits for paint in Ipswich, MA. Leica 50mm Summilux @ f1.4
Conclusion
In my opinion this adapter, even though overpriced for what it is, is the best option for shooting Leica M mount lenses on your Sony a7lll. It connects to the lens and the camera very securely. The machining is superb as is most German made camera gear. It accepts any M mount lens. So that gives you a ton of options for old legacy glass lenses with this mount like Zeiss, Voigtlander and of course Leica. This means for pretty low money or a lot of money you can get some very beautiful looks to your images. I have a Leica screw mount 35mm Summaron f 3.5 lens from before WWll with an bayonet M mount adapter that works with this adapter that gives results which are amazing.
I found the Canon lenses and the Sigma MC-11 to be a great alternative when starting to switch systems. If purchasing the Sony a7lll is on your list then I suggest purchasing this adapter if you are coming from Canon. Save your money and buy a Sony mid range zoom lens like the 24-105 f4 or 24-70 f4 when finances allow to get started. Sadly if you are coming from Nikon you will have to go the more expensive Metabones route.
In both cases if you are considering purchasing an Sony a7lll and have a large stash of Canon or Leica M mount lenses than these two adapters should be your first purchase if a complete move to Sony is not in the cards. I intend to buy an a7lll when finances permit and slowly move into Sony glass. These adapters will allow me to do this.
The results are worth it! The sensor in this camera is superb and gives incredible results. The detail is stunning and in my opinion is worth the switch. I know Canon and Nikon have jumped into the fray but their first offerings are in my opinion not as good as this camera. For Canon, they have introduced the R lenses and I for one am impressed but the camera comes up short. I know they will blow us away in the future but the future is a ways off.
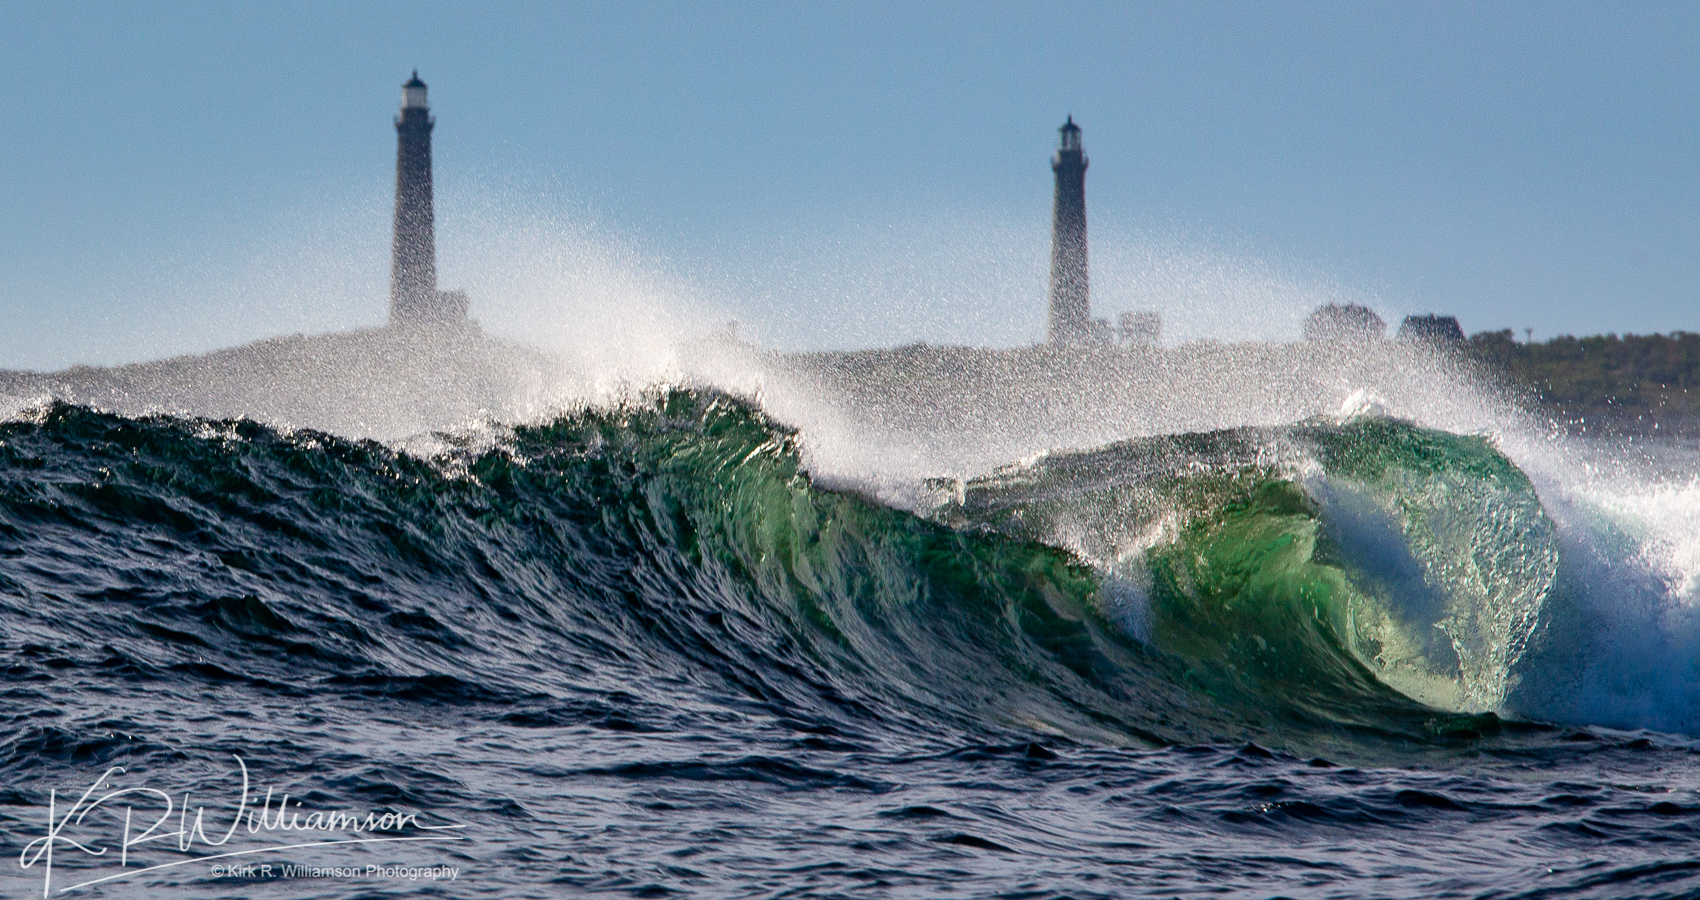
Yesterday was an incredible day! I was up early to go out and make some shots for boat tours I will be offering in 2019 and the light and tide were incredible. I boarded my friends boat the “Sea Chase” a wonderful 38 ft former fishing charter boat that will provide a super platform for photo touring by water. the first thing that we ran into was the incredible light shining through the waves breaking at the head of Straightsmouth Island. Besides the really cool color and light, the breaking waves also lined up with Thacher’s Island.
Waves break off Straightsmouth Island in Rockport with the Twin Lights of Thacher’s Island in the distance.
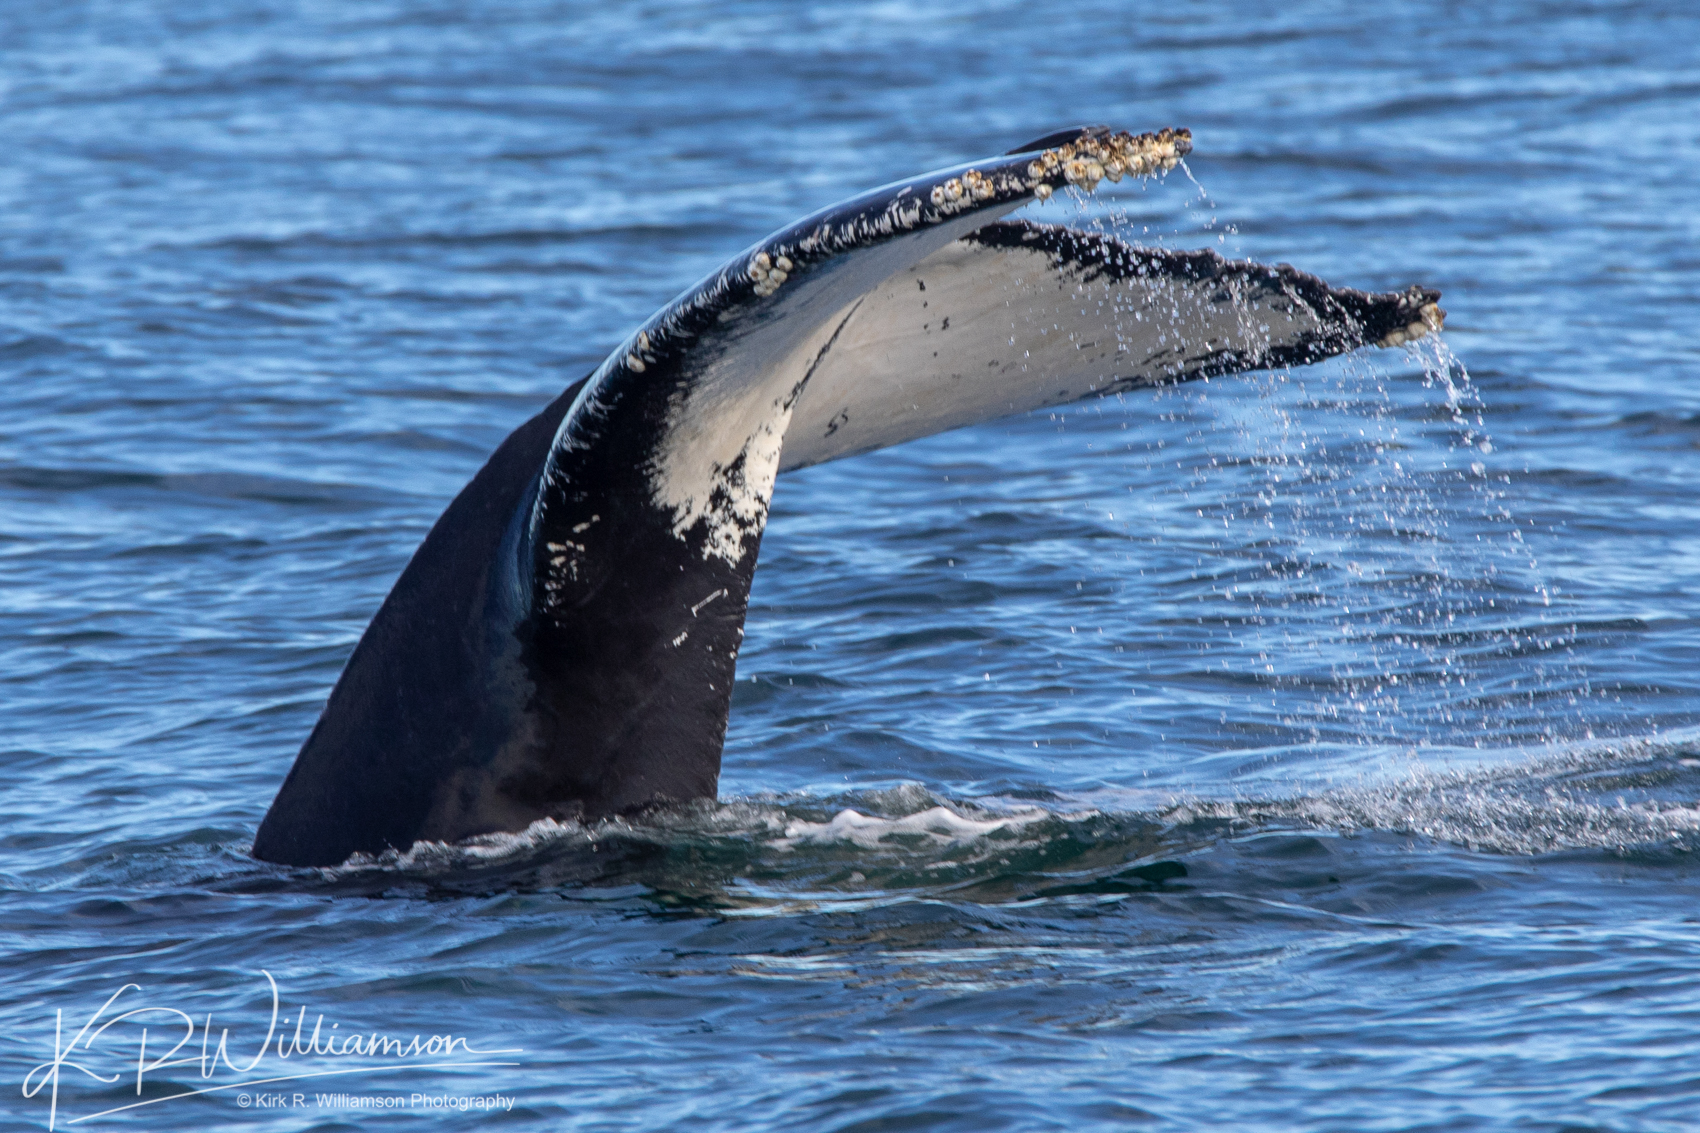
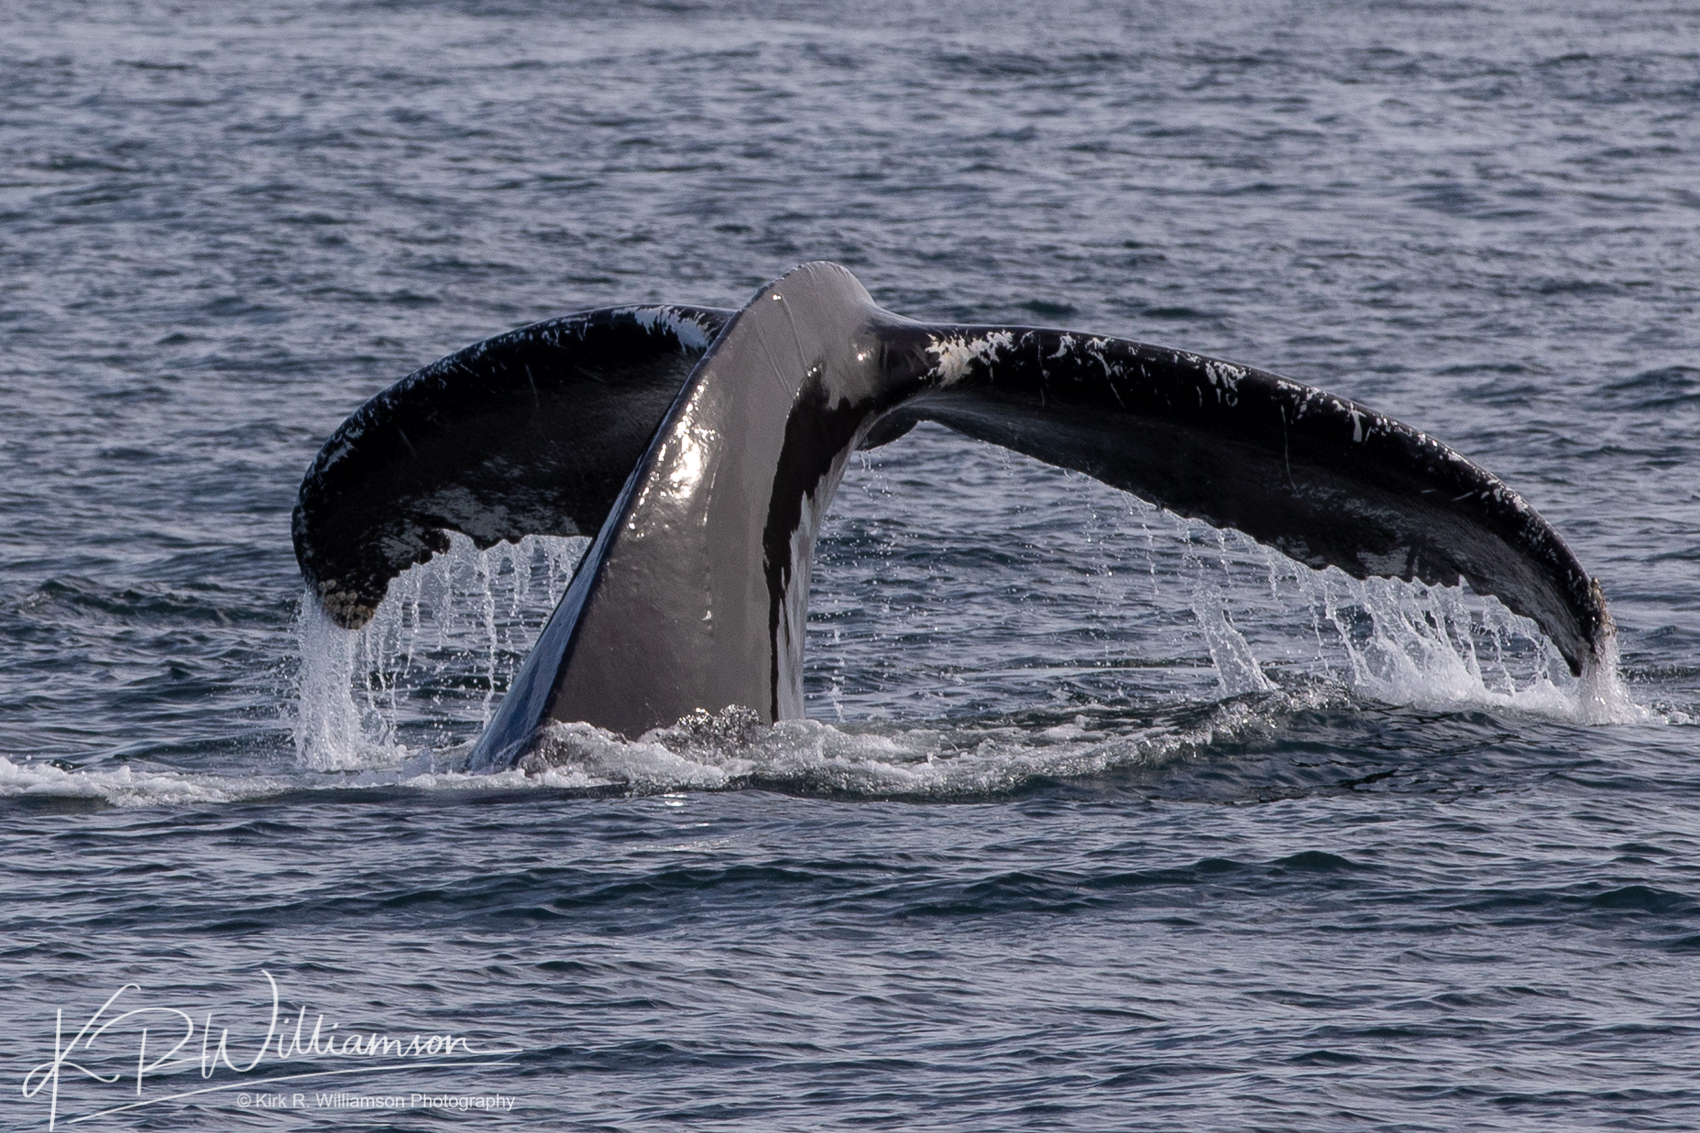
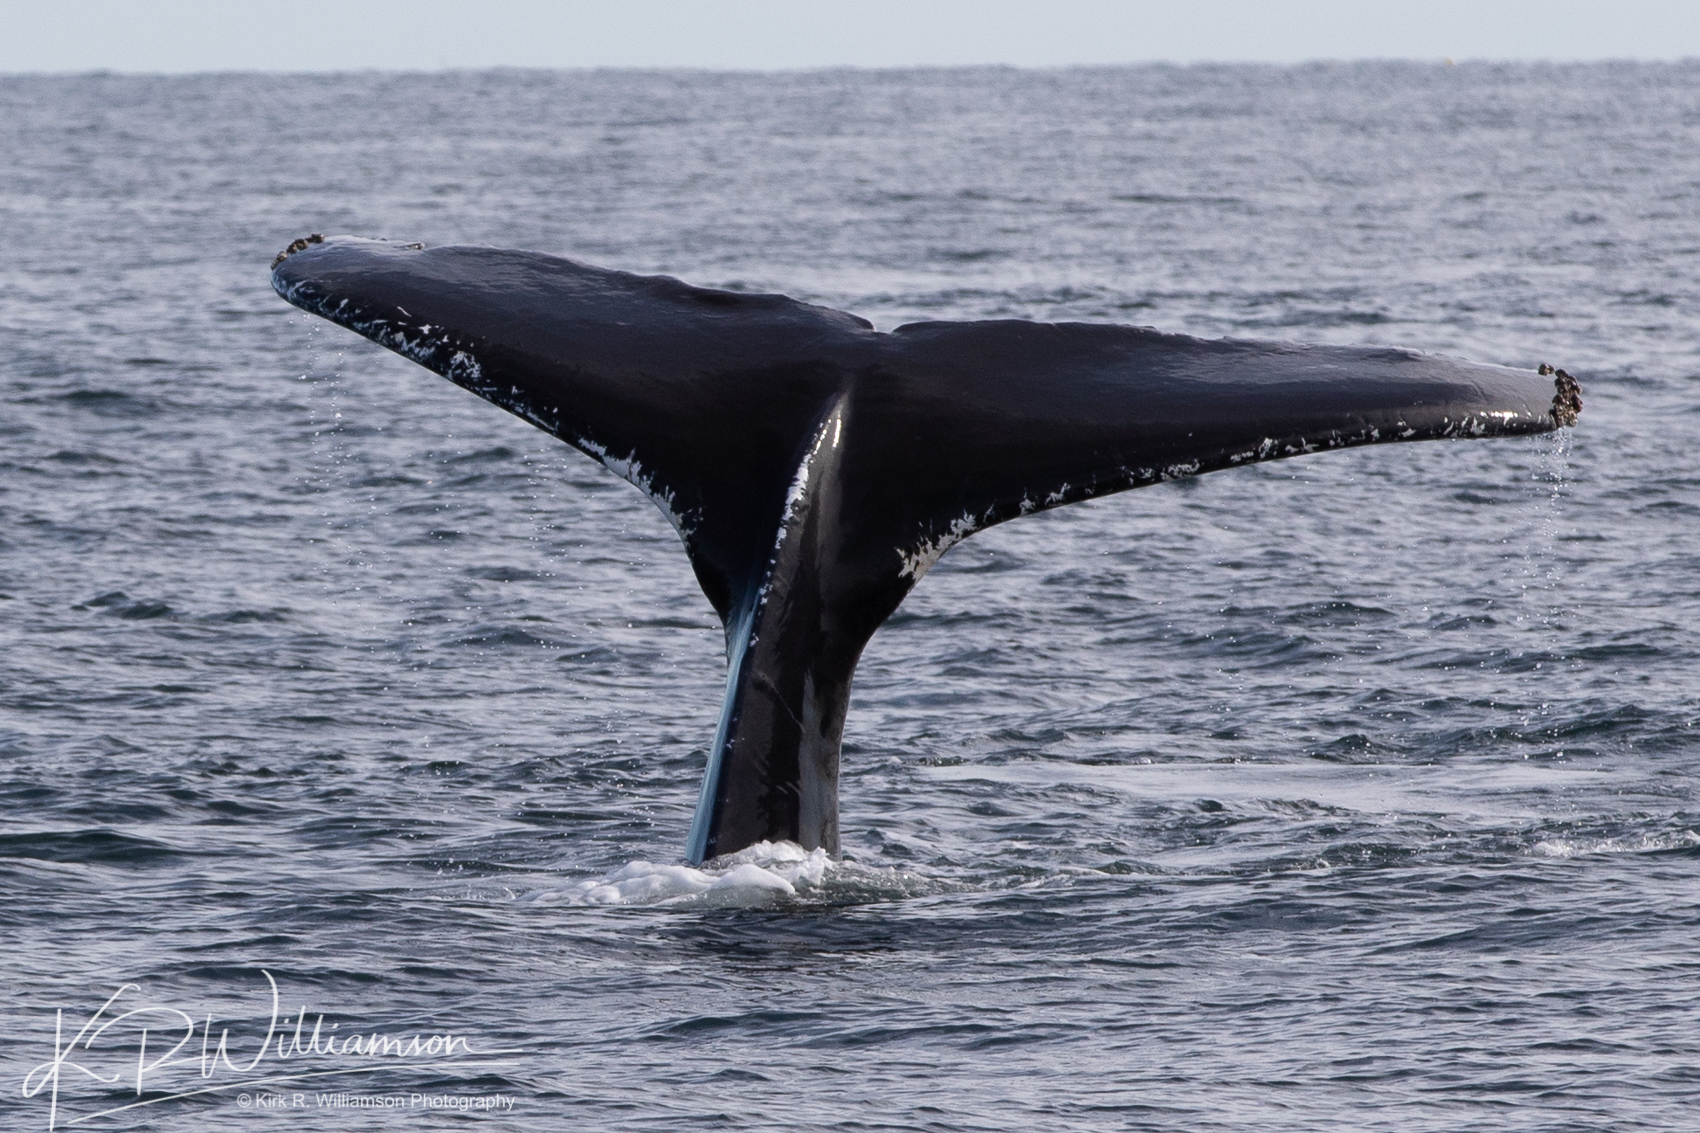
After shooting this incredible scene we headed off shore about 5-6 miles where the whales were feeding. After some pretty boring photos of their backs our patience paid off and they started to sound which means they are headed down. This gave me an opportunity to photograph some flukes. Then they started to lie on their side and flap their fins in the water which is quite a site.
The whales were sounding and showed us their flukes.
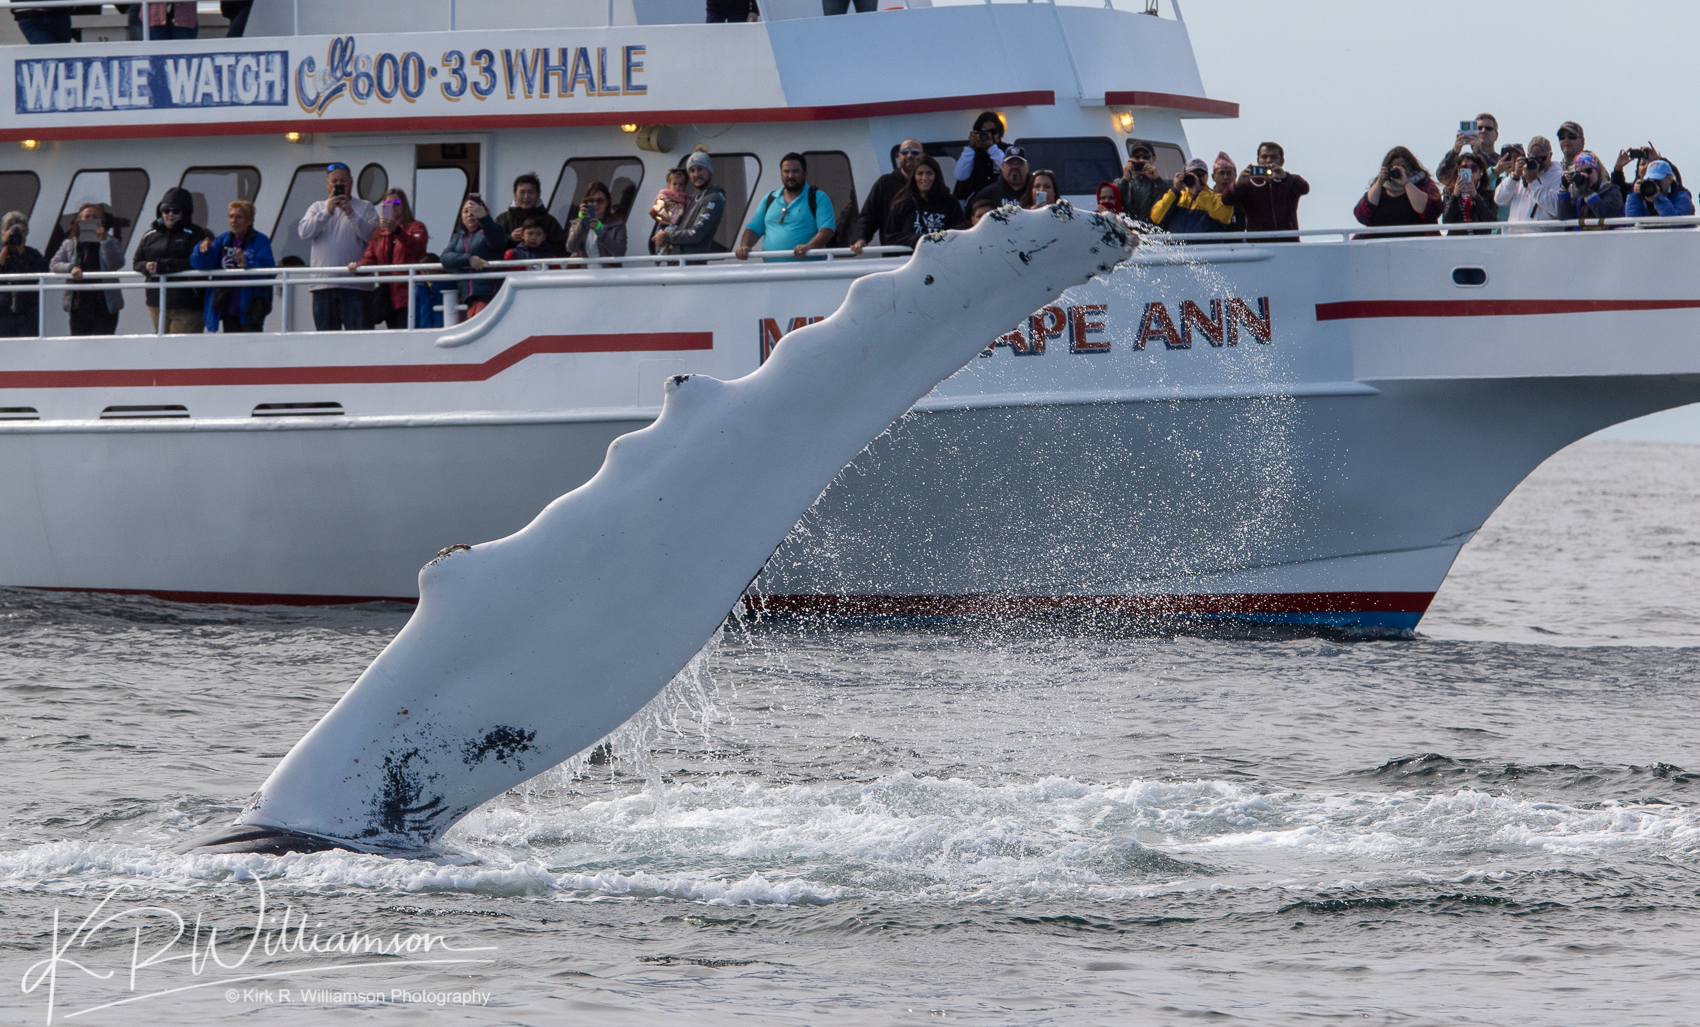
Unless whales are breaching (coming out of the water) then the photos are pretty boring, so it’s imperative to show some scale of these giant creatures. I used the whale watch boat Miss Cape Ann to give some perspective.
Whales lying on their side slapping their fins.
It’s a good idea to always have a long lens with you when photographing whales. Since you will most likely be some distance from them it’s important to have a long focal length lens handy. Shoot at a high shutter speed like 1/1000 sec to stop the action and not get blurry photos. This may require rising your ISO up to 400 or more depending on the light. Good luck with your next whale shoot.